After talking about it for years, we finally decided to embark on a new hobby of fishkeeping.
Myself being the sort who is incapable of doing much on a small scale, I suggested we start with a 75 gallon aquarium.
We went around to a few fish stores checking prices on a tank and stand. I suffered a bit of sticker shock at the prices for a cabinet stand. They were asking $180.00 for a mediocre pine stand built from about $40 in lumber. Talk about your profit margin.
These are very popular stands, made by one of the top companies and found in every fish store, so they must be adequate for the job. Still I figure a 75 gallon setup will tip the scales at somewhere around 750 pounds so I wanted something I had confidence in. Besides, if I'm going to lay out $180 for a cabinet, I expect a better value for my money.
The answer was to build one myself. I looked around the net for some plans, just to save designing something from scratch, but the majority of what I found was just how to make the same thing I saw in the store. So in the end I wound up building what you will see here. I know it's not exactly a snake cage, but I figured I'd document the construction anyway. After all I know alot of herp keepers enjoy their fish quariums as well.
Also, this same stand will work for a standard 90 gallon tank as well. The only difference between a 75 and a 90 is the height. You can modify these plans to fit a 55 gallon easily too. The length of the 55 is the same, but it is 6" narrower.
I have not built a hood to go with this stand. At this time I have no idea when or if I will ever get one built. If I do it will be added to the site. So if you don't see a link to it on this page, there's no need to email me asking about it.
- Material List
- (1) 10' 4x4
- (2) 10' 2x4
- (2) 8' 1x4
- (6) 8' 1x3
- (3) 6' 1x2
- (1) 4x8 sheet of 1/4" oak plywood
- (1) 8' stick of corner molding
- (1) 49"x 19" 1/2" plywood
- 2 1/2" wood screws
- 1" wood screws
- 3d finishing nails
- 4 hinges and 2 door pulls
- Your choice of stain with matching putty and semigloss polyurethane
I hope this materials list is accurate. Some of the smaller pieces I had in scrap laying around, so I bought different amounts. With the oak plywood, you will not use a full sheet by any means, and Lowe's does sell it in half and quarter sheets which can save you some money unless you have a need for the leftover.
Construction of the stand
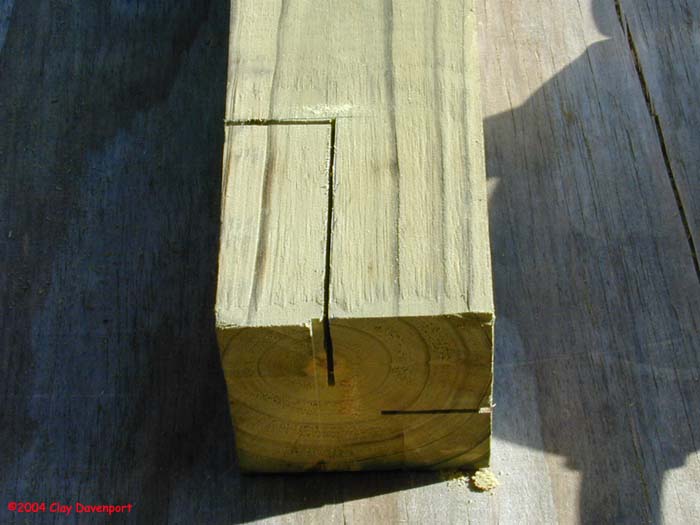
We begin by cutting and notching the 4x4s. You will notice the 4x4 I used is pressure treated. This is not required, but my local lumber yard only carries 4x4s as treated.
Cut the 4x4 into (4) 30" long pieces. These will be the load bearing corner posts.
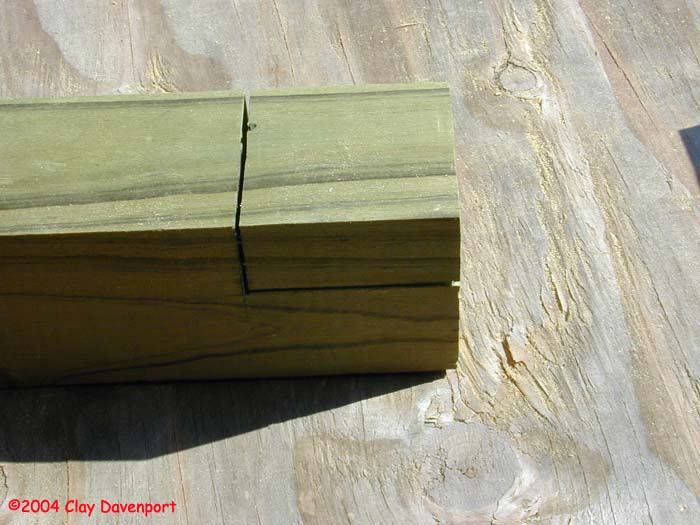
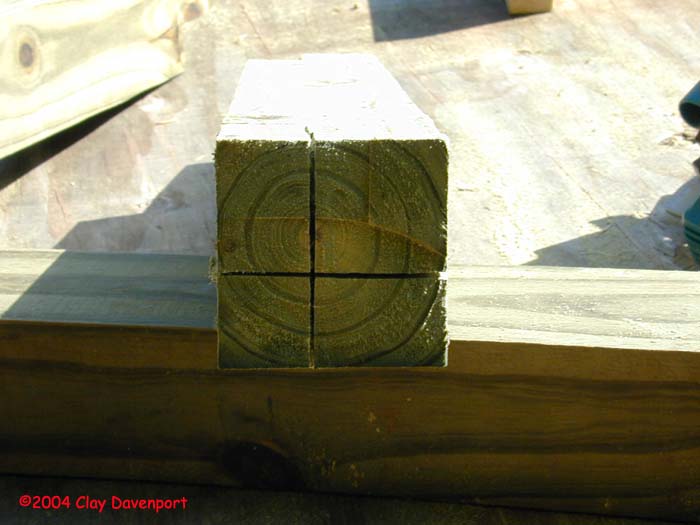
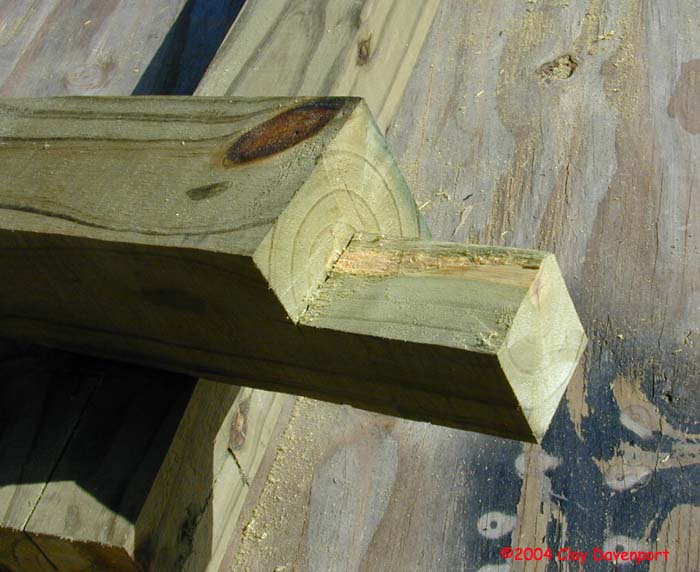
You'll cut notches in the ends of each leg to accept the 2x4 top and bottom frame. It takes a little work to cut out the notches, but it's an important part. The notched legs allow the wood to support the weight of the aquarium rather than screws, which would be the case if you just fastened the frames to the legs.
A 2x4 measures 1 1/2" x 3 1/2" and this is the size notches that will be cut on two sides of each end. Set your blade on your circular saw to 1 1/2" depth for these cuts so you will not cut too deep and weaken the remaining wood.
I tried to take adequate pictures to show the method of cutting out the notches. The circular saw alone will not complete the cuts, you will have to finish them with a hand saw. You will also likely have to do a little additional trimming with a wood chisel to make the 2x4 frames fit flush into them. It's handy to use a piece of scrap 2x4 as a guide for this step.
When cutting the notches on the opposite end, make sure you cut them on the same side.
A note here. After building this first stand, I have built others. I realized that rather than doing this complicated notching of a 4x4, essentially the same strength could be achieved by using two 2x4s, one 7 inches shorter than the other and attached together face to face with the shorter one centered on the longer one leaving a 3 1/2 inch space on either end.
Both ways work equally well, but the 4x4 is the more difficult method.


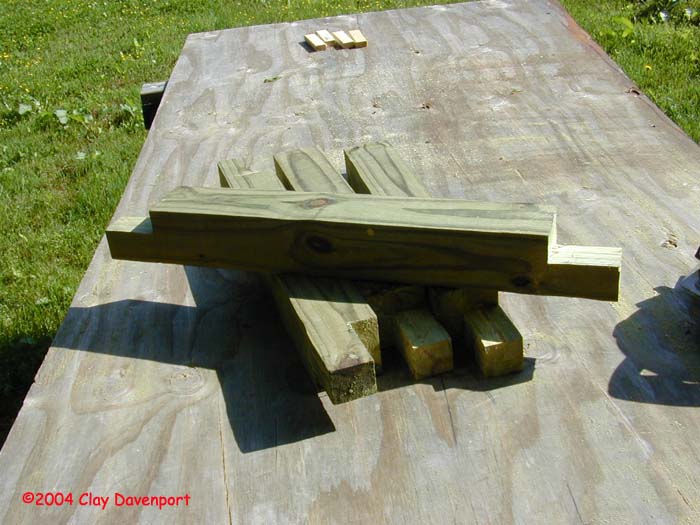
Next you'll make the top and bottom frames.
Cut the 2x4s into (4) 49" pieces and (4) 16" pieces. The overall frame size will be 49"x 19". This will allow 1/2" of wiggle room all the way around beyond the size of the aquarium.
Screw the frames together using 2 1/2" wood screws. Make sure they are square.
Below is a picture of one of the frames.

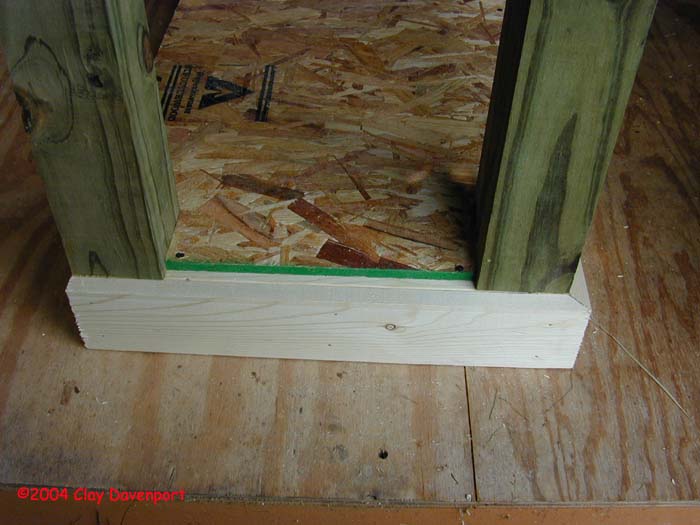
Now you'll attach the frames to the legs you worked so hard on. This frame will bear the majority of the weight, but we still need a few braces.
Cut (2) 16" 2x4 and (2) 23" 2x4. Space the 16" braces evenly in the bottom frame. This will distribute the weight of the aquarium over more of the floor space.
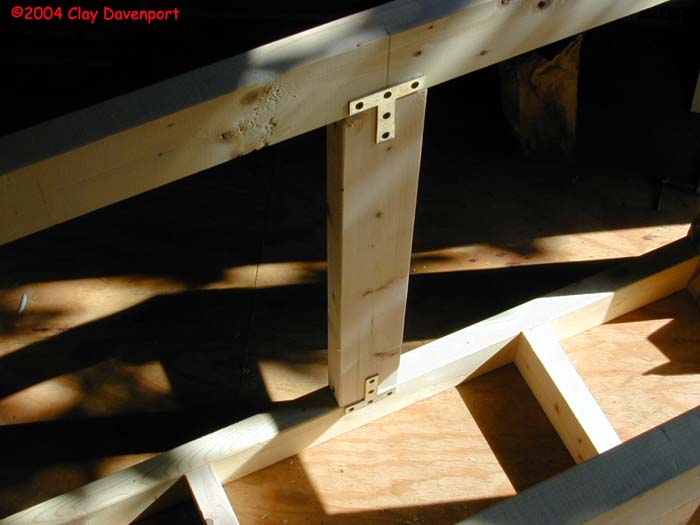
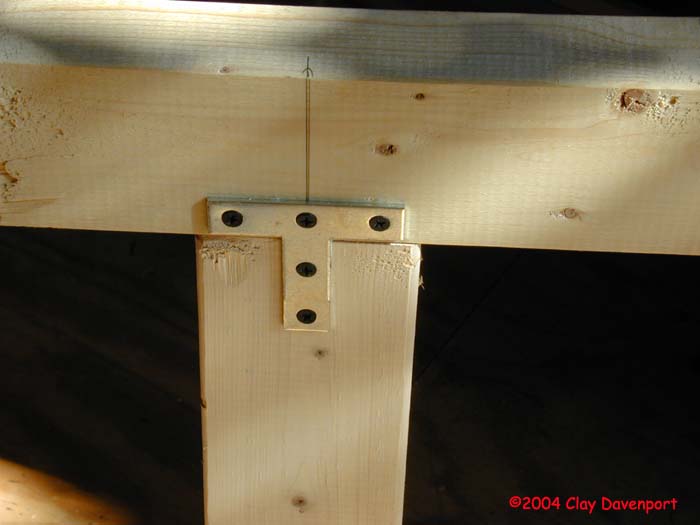
The other two pieces will be the center braces for the front and back. Measure the frame and make a mark at dead center on the front and back pieces. You will center the braces on these marks.The front brace will also act as a stop and gap fill for the doors.
I used metal "T" brackets to strengthen the center braces and then angled wood screws into the frame rails to secure them.


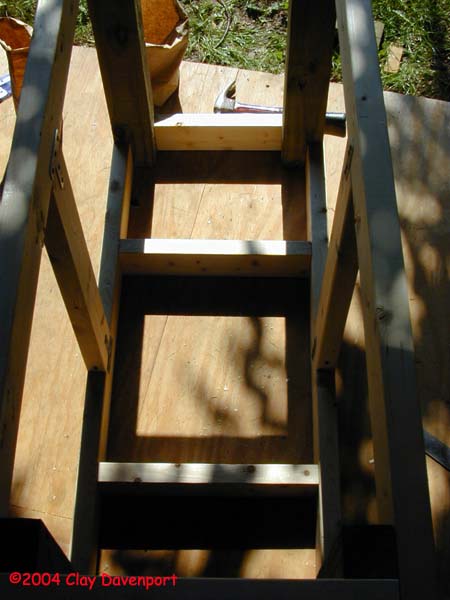
Next, you'll install the floor of the cabinet. You'll see that I used OSB board for the floor. I only did this because I had some scrap pieces around and didn't want to have to buy a sheet of plywood just to get this small piece. If you're buying the wood, go with plywood, it will hold up much better should you get it wet.
You'll need to cut notches out in the floor to accomodate the braces. Once you have it trimmed properly, secure it to the bottom frame rails with wood screws.
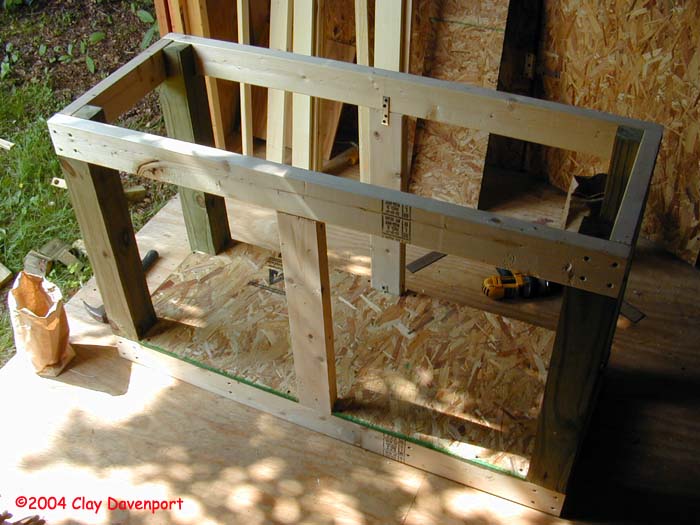
The frame is now finished. Everything you've built so far is designed to support the weight of the aquarium, and it will do a fine job. It's still not much to look at however, so we'll move on to the finish work by adding the trim and building the doors.
First, we'll use the 1x4 for the top and bottom trim. These pieces will cover the 2x4 frames
I cut the ends of the trim molding on a 45° angle for a better finished look. If you do not have a miter saw, you can use a butt joint here, just cut the front pieces long enough to overlap the ends.
Once the pieces are cut, attach them to the frames with finishing nails. the finishing nails will be countersunk and puttied over for a smooth look. Use just enough nails to secure the pieces. The molding is just for looks and doesn't not support any weight. The fewer nails you use, the fewer you'll have to putty later.


After you have attached the 1x4 trim, you'll cut the 1/4" oak plywood for the panneling. Cut a piece for each end and nail it on with finishing nails. For the front, you'll cut 3 narrow pieces to cover the corner posts and the center brace. A back is not necessary, and is often left off to allow for the routing of hoses acssociated with the filter. If you need a back on the cabinet, attach it now.
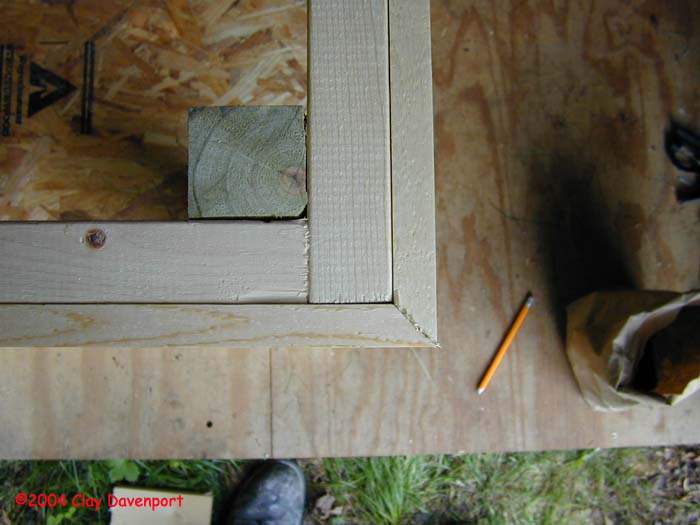
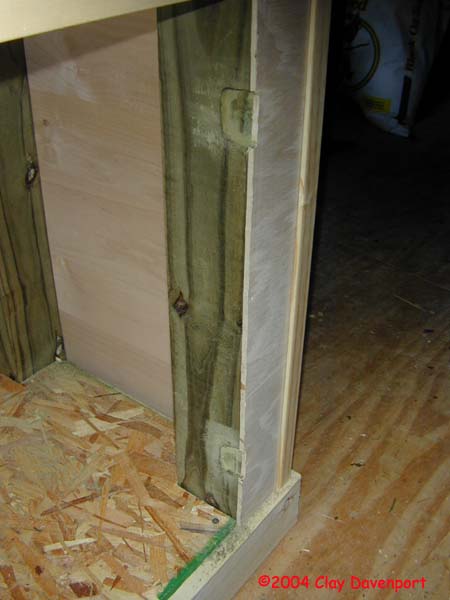
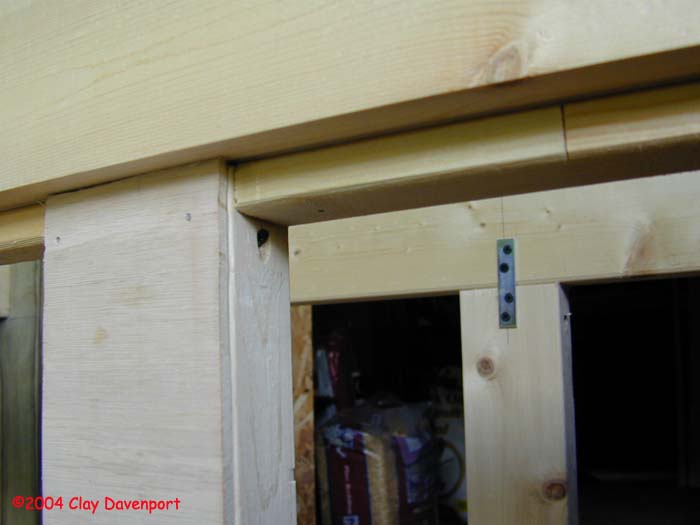
Next you'll cover the corner joints with the corner molding. Cut one piece for each corner and attach it with finishing nails. It's a good idea to predrill the holes in the corner molding with a very small bit to prevent splitting the wood.
Below is a picture of the oak plywood panel and the corner molding installed on one end.

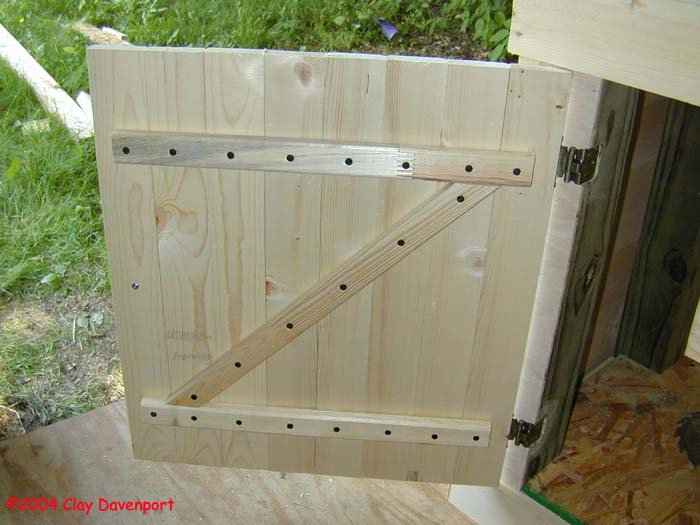
Next, we'll make the doors. My doors were 22 3/4" high. This measurement should work for you, but measure the space just to be sure, and leave a slight gap to make sure the door doesn't drag.
You'll need (8) 22 3/4" 1x3 for each door, a total of (16). In the pictures further down the page, you can see that I have used a router to round the edges of the 1x3 pieces. This provides a much better look to the finished doors. I suggest you go ahead and round the corners of the 8' boards before you cut them.
To round the edges, I used a round over bit set to a shallow depth. Use a scrap piece of wood to check the setting before cutting on the door pieces.
Make sure you cut the pieces straight or the doors will look funny. The miter saw comes in handy for this.
After you cut out the 1x3 slats, lay them side by side on a flat surface, making sure the ends are all even.
Cut (4) 1x2s 18" long and attach them to the door pieces, using a screw in each piece. Now cut a cross brace to lay diagonally between them to keep the pieces from shifting. If you have the tools and the inclination, you can join the pieces together with a biscit cutter. I don't have one of these, so I used the cross braces instead.

Hanging the doors is the most difficult part. It can be hard to get them level and closing evenly if you're not familiar with making doors.
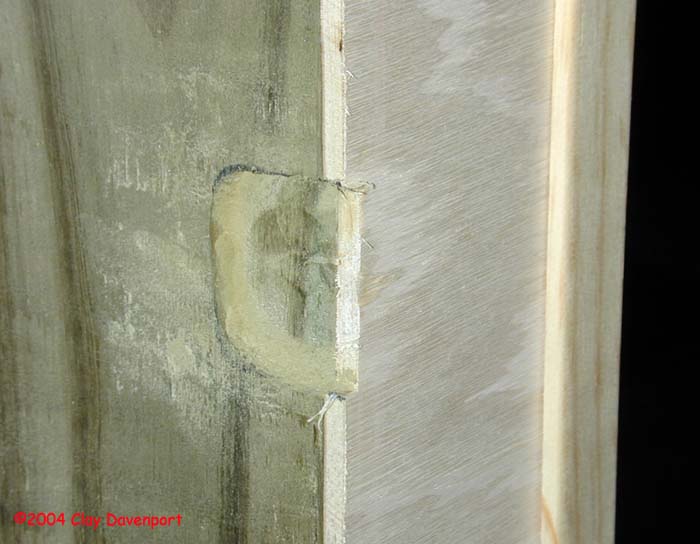
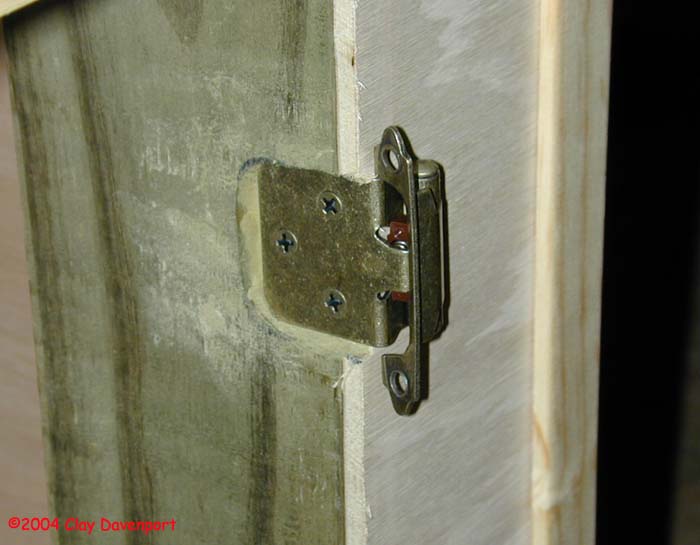
For hinges, I used self closing flush mount hinges in antique brass. I recessed the hinges into the corner posts 1/4" so that the edge of the door would completely cover the door opening.
Center the hinges four inches from the top and bottom frame rails. That's four inches to the center of the hinge. Trace around the hinge with a felt tip marker so you can see the mark well.
You can use a wood chisel to cut the hinge recess, but it's much easier and more precise to use a router. I used a rabbiting bit set to 1/4" depth to make the recesses. Once the notches are cut, attach the hinges.
It's somewhat embarassing now, but this is absolutely not the way these hinges are supposed to be used. I'm sure any cabinet makers out there get a laugh at this. I however am self taught in what meager woodworking abilities I have, and back when this stand was built I hadn't yet learned the proper use of these hinges. How I came to this option I still do not know.

Now you just need to hang the doors, making sure they are level, close properly, and do not rub either the top or bottom trim pieces. Take your time on this step, and make sure the doors are placed where you want them before attaching them to the hinges.
You may also want to cut a 1x2 to fit under the top frame on each side between the center brace and the corner post. This will fill any gap between the door and the top frame.

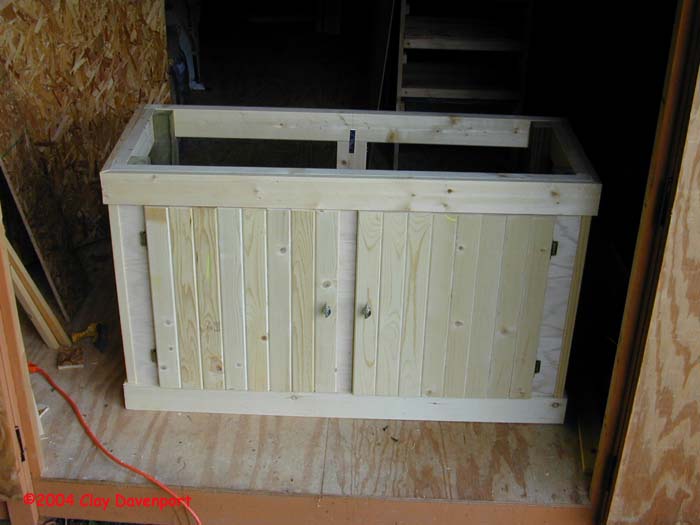
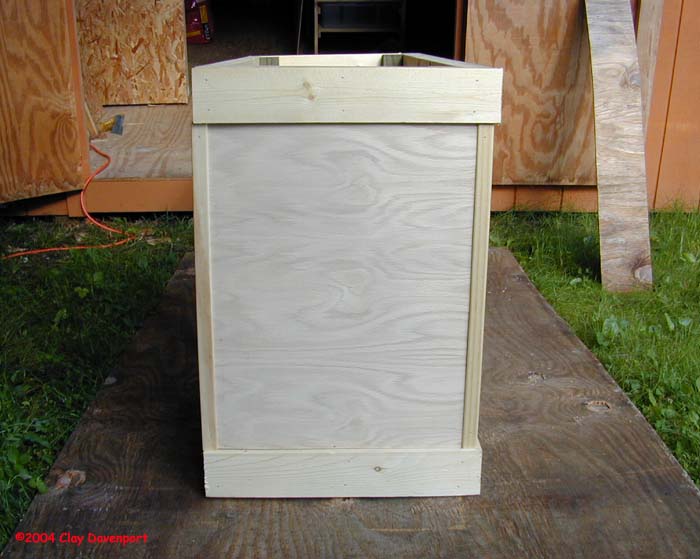
With the doors on, your aquarium stand is finished. Stain it the color of your choice, and attach the door pulls and you have a nice furniture quality stand that will support 10 times the weight of a store bought one for less than half the cost.
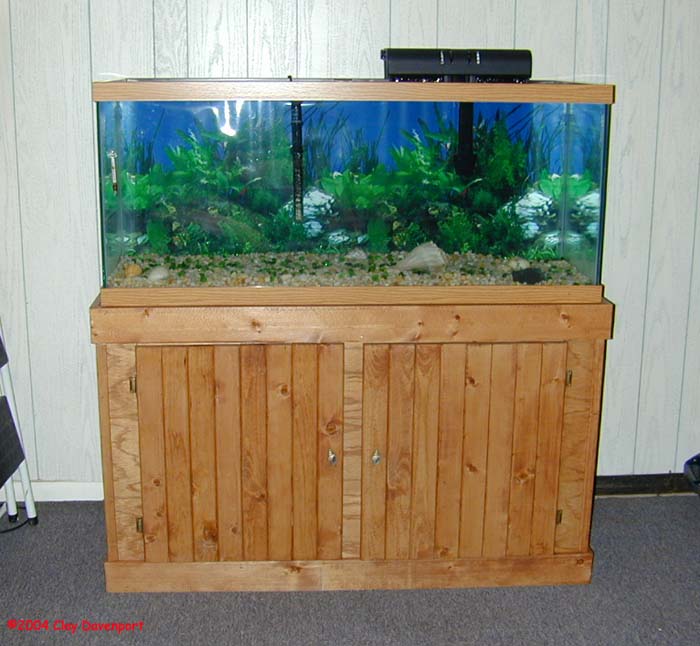
Here is a picture of the finished stand in use. The aquarium is not finished, it is in the process of completeing the initial cycling of the water. I may build a matching canopy for this tank. If I do decide to do that, I will add that to this page.
The retail price for a 48" aquarium strip light is around $82 here, and I will not pay that much money for a plastic flourescent strip light. If I can locate one reasonably priced, I may just go with it, if not I will design a canopy and use my own light fixture in it.
The only addition not pictured here is a strip outlet. I attached a 6 plug strip outlet to the center rear brace. All the associated aquarium equipment will plug in there and only one cord will go to the wall. When using a strip outlet in this fashion, you must mount it as high as possible on the leg to allow for a drip loop on all the cords running to it. You don't want water traveling down the cord and into the outlet.