
This is a new rack design for me. A thanks to Sean Bradley from Exotics by Nature for posting the designs for his racks. I took his method and with some variation developed this rack for my use.
I only built one of these racks. It worked satisfactorily, but I was never completely happy with the suspended box design. It's easy to run into problems if the spacing isn't just so.
As a result I returned to more standard rack building methods with my Hollow Core Door rack. I have since retired this rack, but for the sake of information and idea preservation I elected to leave this page up for anyone it may benefit.
This rack uses Iris CB-110 boxes, and these measurements will only fit this size box. If you choose to use a different box, you will have to alter your measurements accordingly.
These Iris boxes are somewhat more expensive than rubbermaids, at $15 each, but I chose to use them for two reasons. First, Rubbermaid is forevermore changing their box designs. It's highly aggravating that you can build a rack today and probably can't expect to find the same exact boxes in five years. Iris has been making the same boxes for years with no changes, which makes it far easier to replace boxes down the road, or to make racks as you need them over the years and everything will still be uniform and interchangable.
The other reason I chose these boxes was their size. Rubbermaid doesn't make anything in the size I was looking for, at least nothing I could find locally. These boxes measure 19 7/8" X 39" X 6 1/4" high.
There is apparently a sterilite box which is similar in size, but I can't find them anywhere.
I designed this rack for adult ball pythons and other similar sized pythons as well as young boas.
Many people think these boxes, at 39" long, are a waste of space for an adult ball and they use rubbermaid blanket boxes.
Despite what many of the "big breeders" do, I simply cannot house a 4 foot 3000 gram female ball in a blanket box when she can cover a third or more of the floor space when coiled. They may not move a lot, but when they want to, I want them to have more room than that. These snakes have the potential of being with us for 30 years or more and I feel they deserve more than that.
Enough with the speech, on to building the rack.
- Material List
- (4) 10' 2 X 4
- (8) 1 X 2 X 6 pine
- (4) 1 X 4 X 8 pine
- (2) 4 X 8 sheets of 1/4" pegboard
- (8) pieces of 1/2" plywood measuring 20" x 12"
- 8 feet of 11" wide flexwatt
- (8) Iris CB-110 boxes
- 2 1/2" wood screws
- 1" wood screws
- 1 5/8" wood screws
- 1 1/4" wood screws
- A tube of Liquid Nails
The total cost of the materials for one rack comes in at a little under $90 as per my local prices for lumber at the time of construction. The eight Iris boxes will cost you $120. This brings the total cost for one rack, including heat, to a little over $200. That's less than $30 per cage.
Construction of the rack
First you will need to use a table saw and rip each 2 x 4 into (2) 2x2s. Two reasons I do this. First I find it next to impossible to find a decent 2x2 around here. They're twisted, full of knots, and basically not worth bringing home. Second, one 10' 2x2 will give you one frame. Factory 2x2s only come in 6 foot lengths, so it threw my count off.
You can of course buy 2x2s to begin with, if you can find good ones, and skip this step entirely, just remember, eight factory 2x2s won't be enough since our 8 are 10 feet long.
After you rip the 2x4s down, you will cut each one into (2) 36" pieces and (2) 20 1/4" pieces.
When you're finished you'll have 16 of each size.
Next you will assemble the frames using the 2 1/2" screws. The long pieces will go inside the short pieces making the frame a total of 39" long (remember a 2x2 is actually 1.5 x 1.5).

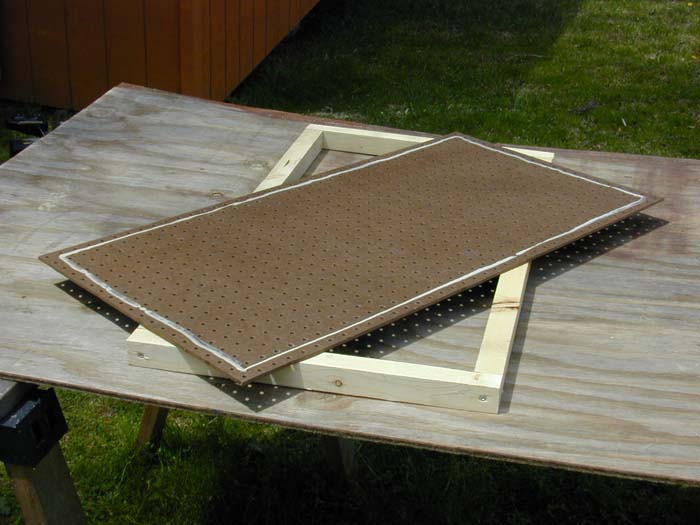
When you're finished you'll have 8 blank frames. Now you're ready to attach the pegboard. The pegboard serves several purposes. It adds more strength to the frame than wire and doesn't risk problems with nose rubbing. It also provides ventilation, meaning you don't have to drill your boxes full of holes.
You'll need to cut your sheets of pegboard into 8 pieces measuring roughly 20" x 39", but slightly smaller will work fine. The size is not critical, but it is important to split the difference between the rows of holes, because you'll use the holes to run your screws through.
You will get four pieces from each sheet of pegboard.
We'll use the liquid nails to firmly attach the pegboard to the frames. Use a very small bead just inside the outermost row of holes on all four sides. Lay the pegboard on the frames and position it properly, then secure it using the 1" wood screws. Use enough screws to pull the pegboard tightly to the frame all the way around, but there's no need to use more than 20 or so since the liquid nails will glue it to the frame.
The wood screws are used because the shape of the head fits flush in the holes of the pegboard and will not interfere with the movement of the boxes. Be careful with the drill when tightening the screws. Since they fit flush in the holes, if you overtighten them, they will pull right through.

Repeat this until you have the pegboard on all 8 frames.
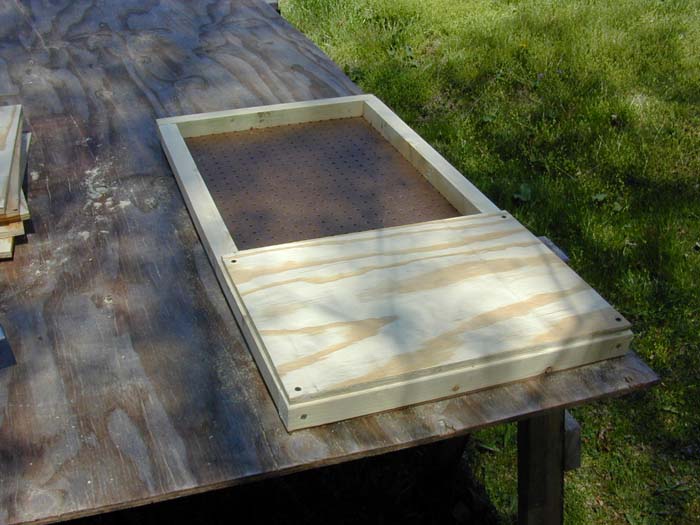
Next we'll add the plywood pieces for the heat tape to be attached to.
The Iris boxes have four small feet, one on each corner. We'll position the heat tape in the center of the back of each level, and the feet will ensure that the box doesn't actually contact the heat tape creating a potential wear point.
You'll need to cut eight pieces of plywood measuring 20"x12". We’ll attach these on top of each frame in what will be the back.
You will only attach the plywood to seven of the frames, since one will be on the top and will not have a heater on it. We'll build a special frame for the heater under the bottom box later on.
Next we need to cut our 1x2 runners which will be the support for the boxes.
Take four of your 6 foot 1x2s and cut them into (8) 36" pieces. These runners are shorter than the frames to make it easier to slide the boxes in.
Now we can begin putting it all together.
First, a couple of tips on assembling the rack.
Put it together on a table if possible. Assembling it at chest level is much easier than doing it on the floor.
Get someone to help you put it together. I assembled this one by myself, so it is possible, but it will be much easier if you have an extra set of hands to help position everything.
Trust your marks. You'll be marking the uprights for placement of the frames, and you may not think it's going to come out right. Trust the marks, it will work fine.
First thing you need to do is take the (4) 1x4x8 pieces and mark them. These will become the legs for the rack. You'll need a tri-square or a speed square for this step.
Make your first mark 2" from the top, then make a mark every 8 1/2". This will give you a mark at the following locations: 2", 10.5", 19", 27.5", 36", 44.5", 53", 61.5", and 70". Take your speed square and make a line at each mark. Make an X below each line to designate on which side the frame will be located.
The reason for beginning 2" below the top of the legs is to provide for potential storage space. We all know any flat surface in a herp room is likely to begin collecting things. You don't want to find yourself using the pegboard above the top drawer to sit things on, as this will interfere with the ventilation as well as annoy the snake living in that drawer. With the extra 2 inches of legs, you can, if you desire, cover the top with a piece of plywood and have a nice sized shelf for storage.
The legs themselves are still 8 feet long. You can cut them off now to your desired height. The legs on my rack are 77 3/4" long.
Now you will attach the frames.
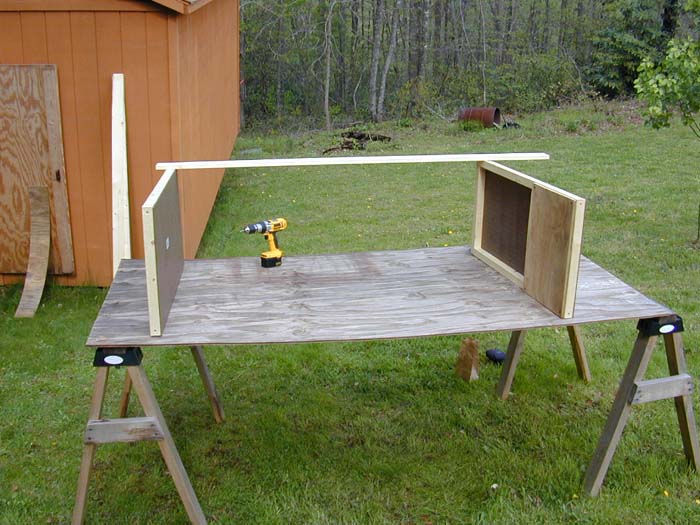

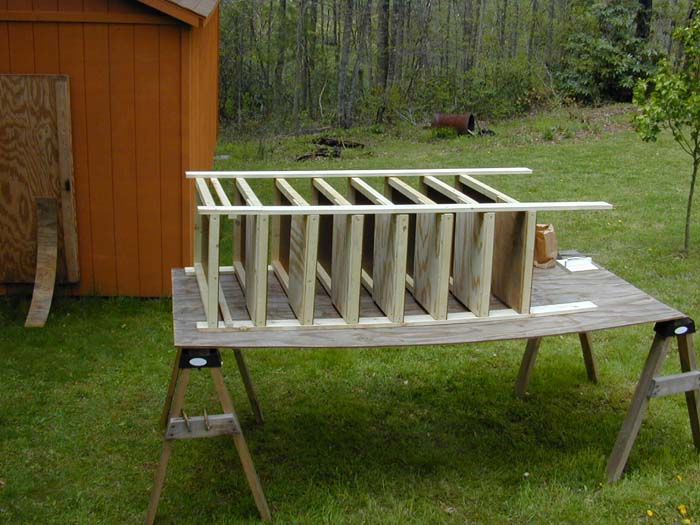
Start at the top and use the 2.5" wood screws to attach the legs to the frames. In the picture, the frame on the right is just there to keep the leg level until you get a few of the frames attached.
This is the most difficult part of the rack. You'll really just have to figure out the best method for you. You can attach all the frames to two legs, then flip everything over, or you can build it laying on it's front and attach all four legs to the frame as you go. There's no easiest way to do this part, and here is where a helper really comes in handy.
Be sure to keep each frame oriented properly as well. The plywood heater supports should be on the top back of each level.
Just a reminder do not line up the marks in the back with the top edge of the plywood heater supports. If you do this your frames will not be level. These marks were measured to the top of each frame, so on the rear legs you will line up the top of the frame to the line, not the top of the plywood.
We are now ready to begin attaching the runner supports that the boxes will slide on.
We will use spacers to make sure all the runners are uniform and none of the boxes bind up in the rack.
Using some scrap wood, cut two short spacers 1 1/4" wide. It is very important that these spacers be cut exact, and identical. The reason for what seems to be a large distance between the frame and the runners is the way the Iris boxes are made. They have two small plastic braces molded into each side. These braces are pictured below. The only alternative was to grind these braces down with a Dremel tool, and I chose not to do that.

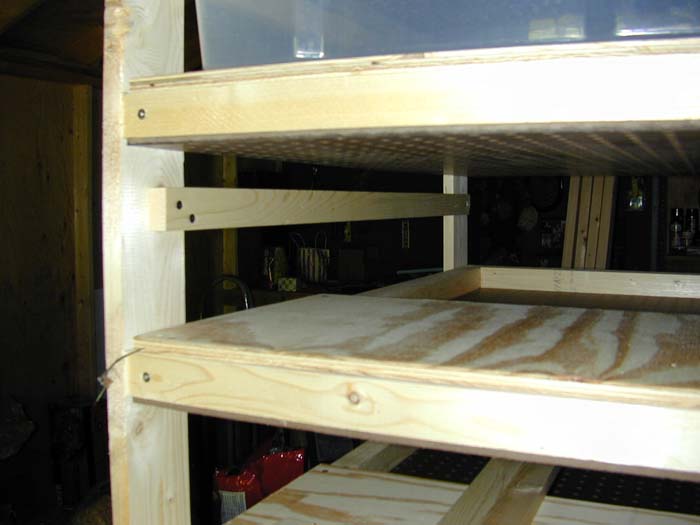
The photo on the left above details the plastic braces I mentioned. The tubs will actually slide on these braces and only contact the runners at these four points.
The runners will be placed 1 3/4" from the front edge of the legs. This gap will make it easier to insert the tubs into the rack.
Pre-drill the holes in the runners. Use three 1 1/4" wood screws in each runner, one in the front and two in the back.
Start the screws in the holes before putting the runner in place. You will place the spacers between the frame and the runner, being sure to inset the runner 1 3/4" from the front.
Now, keeping the runner tight against the spacer, tighten the front screw first, then move to the back. With only one screw in the front the runner can pivot if needed to ensure it remains against the spacer.
Repeat this process with the remaining 15 runners.
Now, everything is going well, except we have no place to put the heater for the bottom tub. We'll make a partial frame to serve this purpose. You can make it any way you want, but I will describe how I did it.

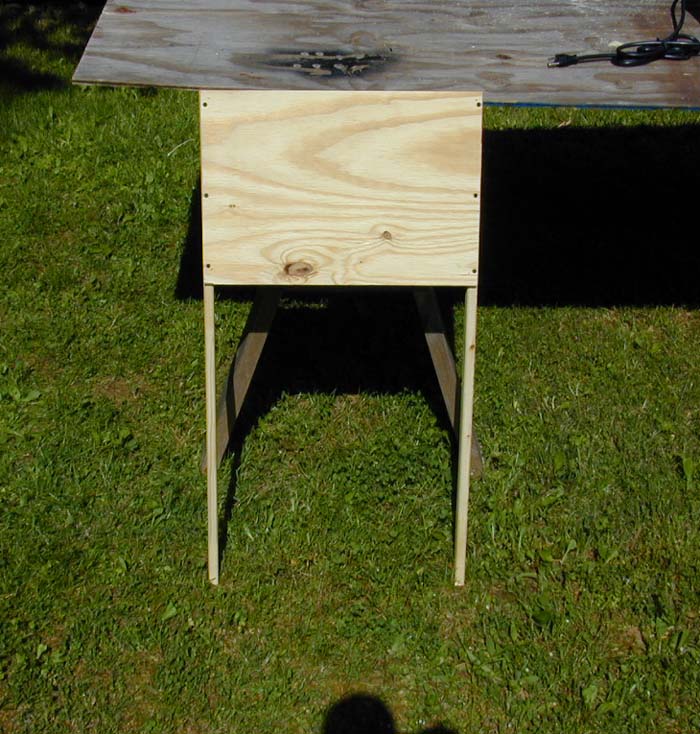
The picture above shows the bottom most frame of the rack. This frame is only to provide a place to attach the heater for the bottom tub.
Cut the last two 1x2x6 into two 39" pieces. You will attach the last piece of plywood to these two pieces as shown above, and install it as you did the other frames.
You probably noticed earlier that the plywood pieces are slightly smaller in width than the frames.
This was by design to eliminate the possibility of the plywood interfereing with the assembly of the rack. Make sure to take this variance into account when attaching the plywood to these two pieces.

This picture shows how the racks sit on the plywood pieces where the heaters will be. The round feet on the tubs prevent them from actually contacting the heat tape.
Next we will install the heat tape and the rack will be finished.
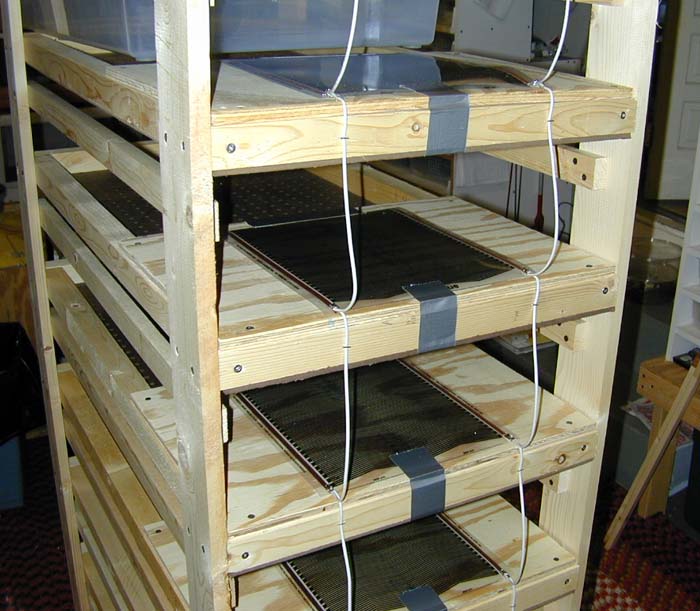

In the above pictures you can see the method I used to wire the rack. Each piece of heat tape was wired to the next so that one plug controls the entire rack.
The second picture shows a closeup of the solder connections. Two wires are on each connection, one from the piece below and one going to the piece above. The cord with the plug is attached to the bottom most piece of heat tape.
Each level uses one foot of 11" wide flexwatt, and the entire rack is plugged into a thermostat.
That's it. The rack is ready to use. So far I've been pleased with the rack design. The tubs are large enough to comfortably accomodate large female ball pythons as well as younger boas, and it's nice not to have to drill the tubs full of holes.