
For anyone who maintains a sizable collection of snakes one of the smartest things you can do is raise your own rodents. Not only do you realize a cost savings as compared to buying them, but you have the ultimate convenience of having any size rodent readily available in live, thawed, or prekilled, to accomodate all your feeding requirements.
Unless however, you have an effecient system to house and breed the rodents in, you'll find that there will quickly be far more work involved in raising the rodents than in keeping the snakes. A good rack system, with feed hoppers and most importantly an automatic watering system is practically a requirement when raising large numbers of rodents.
There are several commercial manufacturers of rodent racks and they offer fine products. I know I'd love to have a rodent building completely outfitted with Freedom Breeder rodent racks. The cost to the average hobbyist is prohibative though. I just cannot justify spending as much as three thousand dollars on a rack to raise mice in.
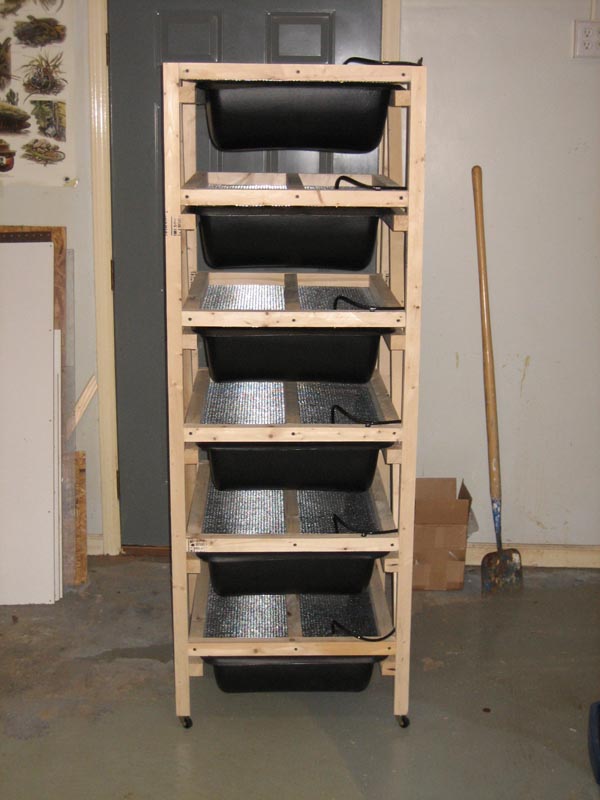
My solution, as always, is to build it myself. On this page I will detail the construction of my latest rat rack. I built this rack for the purpose of growing out weanling rats in my rodent colony. It would work equally as well as breeder tubs or what have you, I just needed an additional rack to house the young ones until they reach feeding size.
Be sure to read the final notes at the end of this article before beginning construction on one of these racks. There will be some tips and suggestions I gained from building it myself as well as notes on the materials used etc.
Also be sure to see the update to these plans with instructions for supporting the tubs from underneath, which I highly recommend, Here
- Tools Used
- Table saw
- 10" Power miter saw
- (4) 90 degree corner clamps
- (4) large spring clamps
- cordless drill with bit for pilot holes and phillips screwdriver bit
- tin snips
- tape measure
- Materials List
- (9) 93" 2x4 studs
- 2 1/2" wood screws
- 14' of 1/3" hardware cloth 24" wide (See note at the end of the page concerning the 1/3" hardware cloth)
- (4) 1 1/4" Swivel Bearing Casters (light duty)
- 6 concrete mixing tubs
Cut List
Cut your materials into the following pieces:On a table saw, rip the 9 2x4s into 18 2x2. (Be extremely careful, don't want to lose a finger.)
Take six of the 2x2s and cut each one into (2) 24" long pieces and (2) 21 1/2" long pieces
Take four of the 2x2s and cut each into (3) 27" long pieces
Cut four 2x2 into 66" long pieces
From the scrap cut (4) 10" pieces and (2) 7/8" pieces, these will be used as spacers
Cut two of the remaining 2x2 pieces into (6) 24" long
The last two 2x2s will be the side braces and will be cut to fit after assembly.
With the exception of ripping the 2x4 with the table saw, all the cuts here were made with a power miter saw. A circular saw, or even a hand saw can be used, but the miter saw makes it much quicker and easier to make exact cuts.
After cutting everything up you should have the following:
- (12) 21.5" 2x2
- (18) 24" 2x2
- (12) 27" 2x2
- (4) 66" 2x2
Assembling the Rack
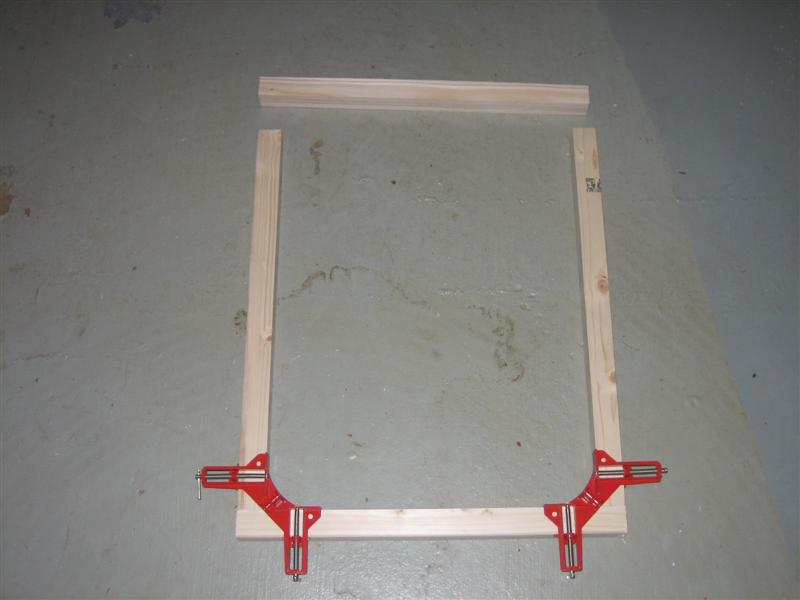
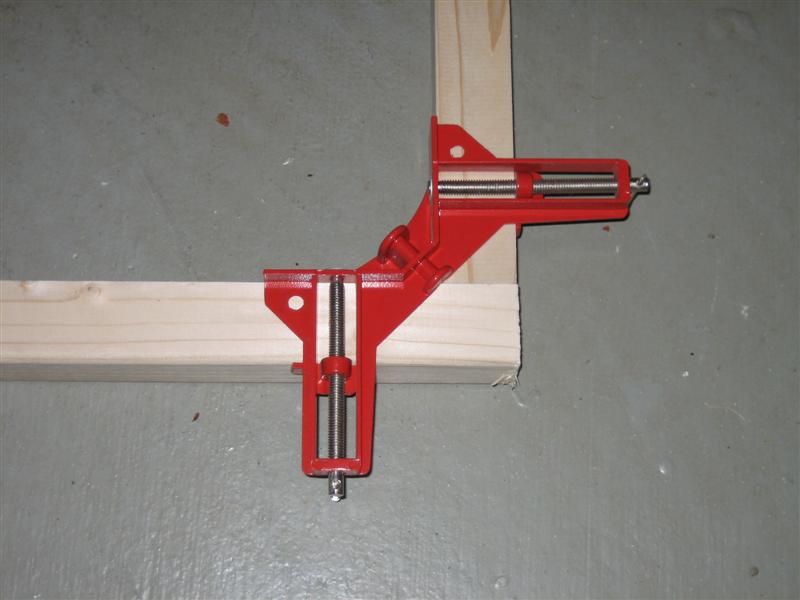
We will begin assembly of the rack by making the 6 frames. Take (2) 24" and (2) 21 1/2" pieces of 2x2. The 24" pieces will be the side rails and the 21 1/2" pieces will be the front and back of each frame. Screwed together the frames will measure 27" x 21 1/2".You'll notice in the pictures I used four 90 degree clamps to hold the frames square while I screwed them together. This is not absolutely necessary if you do not have the clamps, but it does make this step easier.
Once you have the four pieces screwed together, take one 24" 2x2 and put it in front to back. I prefered to put them in the middle, but the position is up to you. There are two purposes for these pieces, to add some support to the middle of the wire screen, and to provide a divider to keep the food in one area.
Repeat this step to make the other five frames.


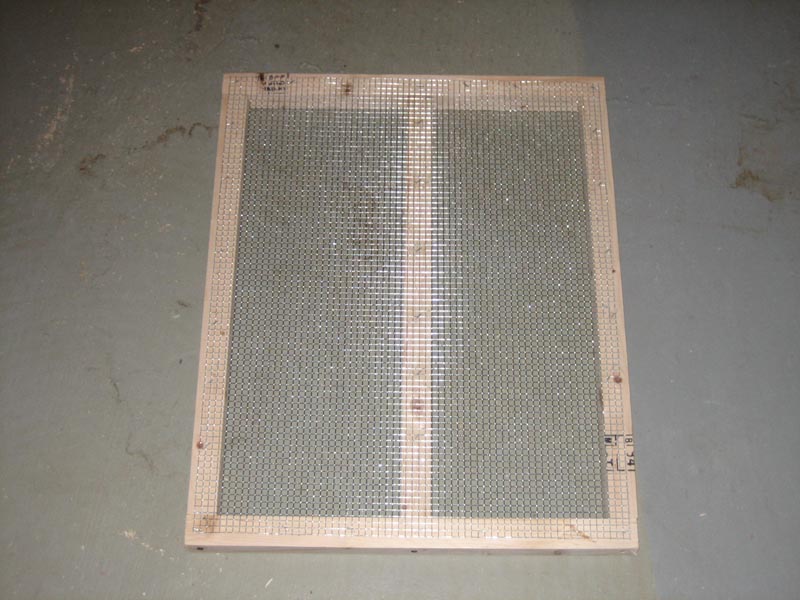
Next you'll attach the wire to the frames. Cut six pieces of hardware cloth just a little smaller than the overall dimensions of the frames.
You'll staple the wire to what will be the underside of the frames. When attaching the wire, begin by putting a staple in the center of one end. Then position the screen so that it is centered on the frame and put another staple out from the first. Work back and forth adding staples until that end is secure. Then start working your way toward the other end. Put a staple a little way up one side, then one in the middle, and one in the other side in a line. Keep doing this until you get to the other end then put one in the center and work your way out to the corners. This method of attaching the screen will ensure it lays flat with no puckers to worry about. If you start by securing all four corners then you'll end up with a high place in the screen at the end.
Install the screen on the remaining five frames.
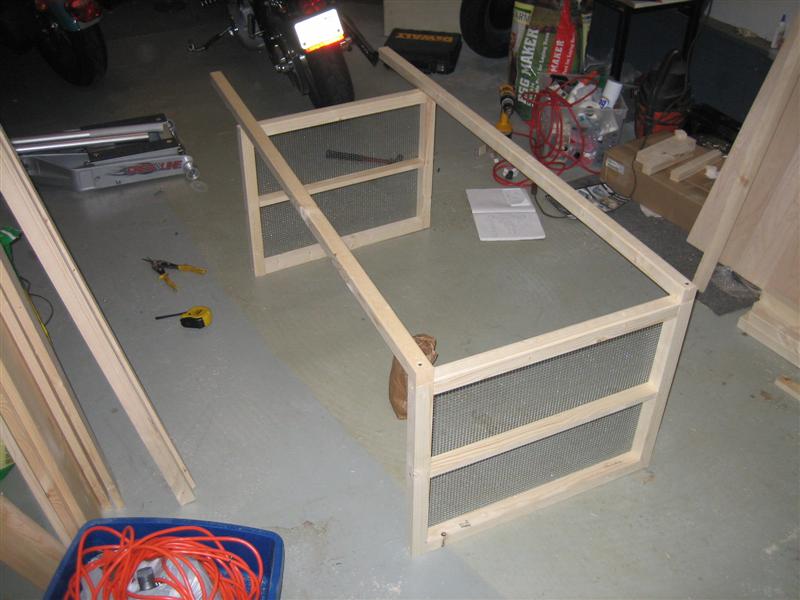
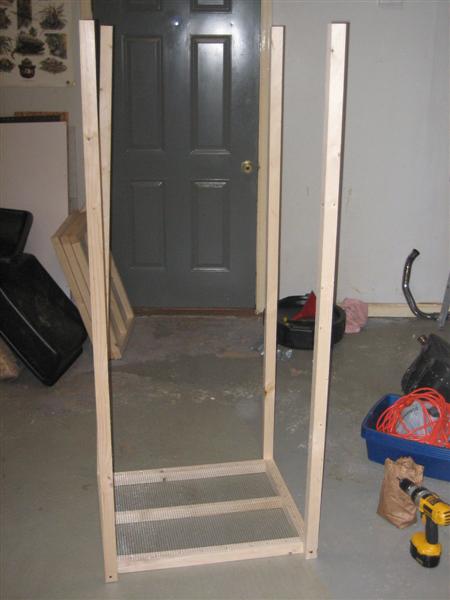
Next we will be attaching the legs of the rack. Take two of the frames and two of the 66" legs. Set the frames on the edge, as shown in the pictures below and lay the two legs on top of them. (The legs will be attached to the sides of the frames).
You will attach one of the frames to the ends of the two legs. The legs should be flush with the edges of the frame. This frame will be the top of the rack, so take care to get it flipped correctly with the screen on the bottom.
The other frame only serves to keep the legs level while they are attached.
Next flip the whole thing over and attach the other two legs in the same fashion to the other side.
Now flip the rack on it's top so that the frame you just attached is flat on the floor and the four legs are in pointing up. Be careful when standing it up since the legs have very little support until you get the next frame in.
Take your four 10" spacers and put them on the four corners of the frame you just installed. These will give you the space for the next frame.
Then take the next frame, again being sure it is oriented properly, and set it down on the spacers.
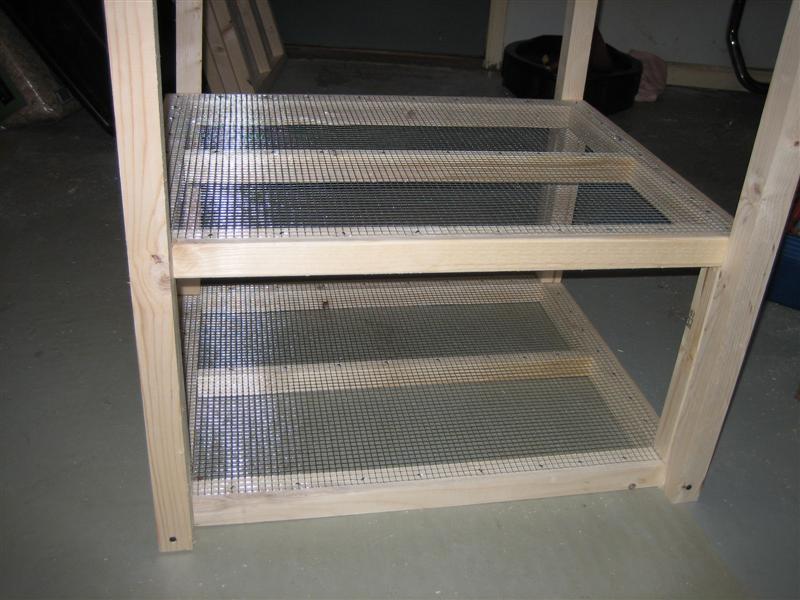
Screw the legs to the second frame, keeping them flush with the front and back edges. Repeat this process until all six frames are attached.
During this step it may look at times that the whole thing is out of square. It will come into line as the frames are installed. With one screw through each leg into the frame it can actually pivot and look like it's out of line. As long as the legs are kept at the edge of the frames it will be straight when you get them all in.
*** Please see This Page for an update to these plans with how to support these tubs from underneath, which I feel is a superior method.
Since some of the pictures on this page do not include the underneath support, I elected to place that information on a separate page rather than change this one and possibly cause confusion***
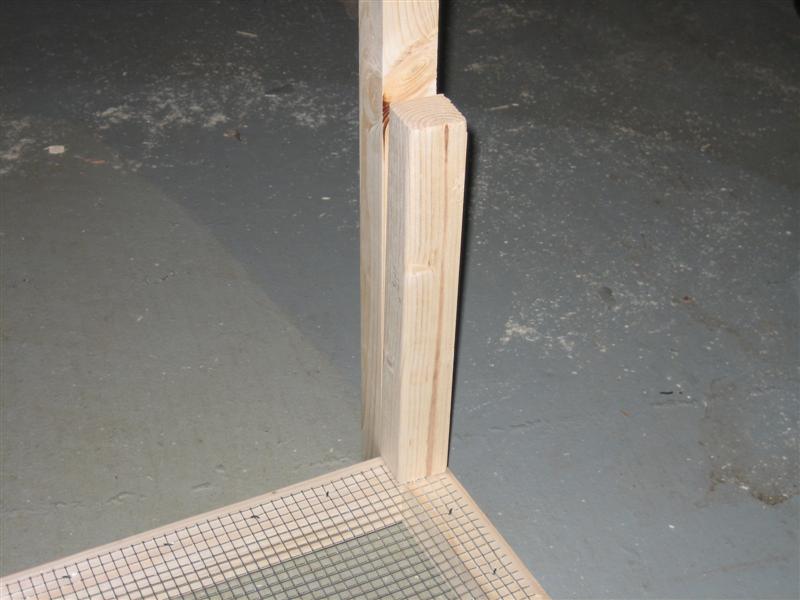
Next we'll install the 2x2 runners that will support the tubs. With the rack still inverted, take your two 7/8" spacers and place them on each end of one side of a frame. Take a 27" 2x2 and lay it on the spacers, then put a screw through each leg into the runner.
Repeat this process until all 12 of the runners are in place.

Next we need to add some braces to the sides to make the rack more stable.
Cut the last two 2x2 long enough to reach from the front corner of the side diagonally to the rear corner. I cut the ends of my braces on an angle so that they fit flush with the top and bottom frames.
Install a brace on either side by putting a screw through the brace into each frame. Do not screw the braces into the runners, I'll explain why shortly.
When attaching the braces, install them so they are opposite. By this I mean one brace will run from the top front corner to the bottom rear corner, while the other will run from the top rear corner to the bottom front corner. You can see what I'm talking about in the picture below. This method provides the most benefit from the braces.
Optionally you can also install a 2x2 down the center of the back of the rack to act as a stop for the tubs. I chose not to do this myself. This is not provided for in the materials list, so you'll need an extra 2x2.
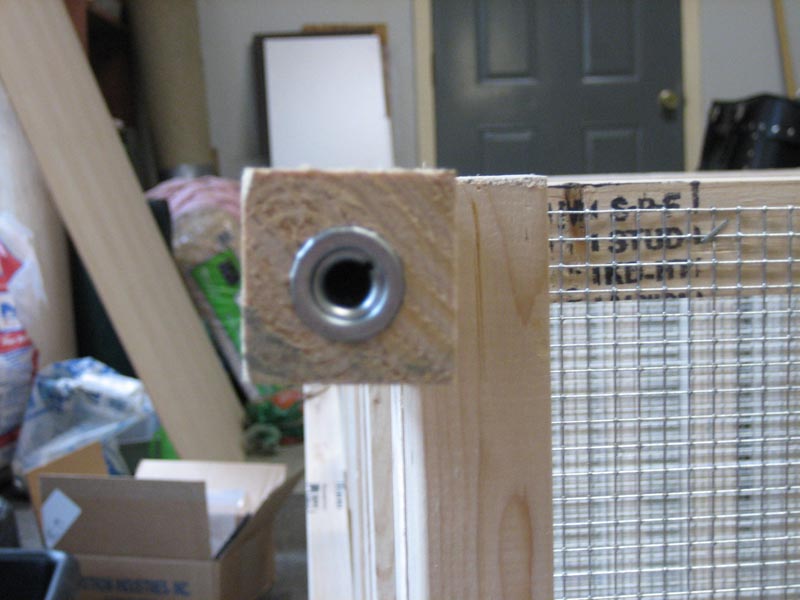
Installing the Wheels
Putting your rack on wheels makes it much easier to move it around as needed. I used four 1 1/4" Swivel bearing casters (pictured below). These are very easy to install. You'll see that the wheels are actually two pieces, the wheel itself with a stem and a sleeve that holds the wheels in place.To install the wheel, you'll need a 3/8" drill bit (refer to the package your wheels came in jut to be sure of the hole size. Different brands may have a different diameter.) Drill a hole about 1 1/2" deep in the center of the end of each leg. Put the sleeve in the hole and tap it into place with a hammer. Then just push the wheel stem into the sleeve until it clicks into place.


Installing the Watering System
An automatic watering system adds more to the effeciency of raising rodents than anything else you can do. A lot of people want to save the initial cost to install one of these systems and elect to use water bottles instead. As far as I'm concerned this is a foolish way to save money. The benefits of the system far outweigh the cost to put it in.If I had to keep water bottles full I'd never even bother to raise rodents at all, it's just not worth the time it takes if you have more than one or two cages of rodents.
Parts List
You'll need the following components for the watering system. I used the Edstrom valves on my racks because that was what was common at the time. You can still get those from Klubertanz. That link goes directly to that page of their PDF catalog.
Reptile Basics is also now carrying a full line of watering system supplies. Their valves are slightly different than Edstrom, but quite a bit cheaper and look to be of fine quality.
Click Here to go to their watering system page.
- 30 feet of 3/16" tubing
- (6) Edstrom vari-flo valves with 3/16" barb fittings
- (5) 3/16" barb Tee fittings
- 1 tank connector supply valve with 3/16" barb outlet
- 18 3/16" tubing clamps (loop clamps) with screws
- 1 bucket (purchased at Lowe's, about 3 bucks)
The cost for the entire watering system will run you about $50. However, it appears Klubertanz does not carry the loop clamps, so you'll need to get those from Reptile Basics or another source.
You can fashion another means of securing the tubing, but they're only 30 cents each and are made for the purpose.
Also, I prefer to use translucent buckets rather than the opaque white ones. You can see the water level through the translucent ones. I use 3.5 gallon buckets found in the paint section of Lowe's.
One thing I will mentionm thrsr watering systems can also be set up hard piped with PVC. The valves for the hard piped system are threaded instead of barbed.
I have not set up a system like that so I won't cover materials or cost. I mention it because of the primary advantage it offers, protection of your watering system when a rat has escaped. If not caught in time, a thirsty rat will chew into the tubing in search of water. I've had this happen more than once, and I advise you to buy extra tubing from the start to have on hand just in case.
The hard piped option, while a little more difficult to install initially, prevents this from happening.
The following photos detail how I installed the watering system. They show my method much better than I can explain it so I'll keep my comments to a minimum on this section.


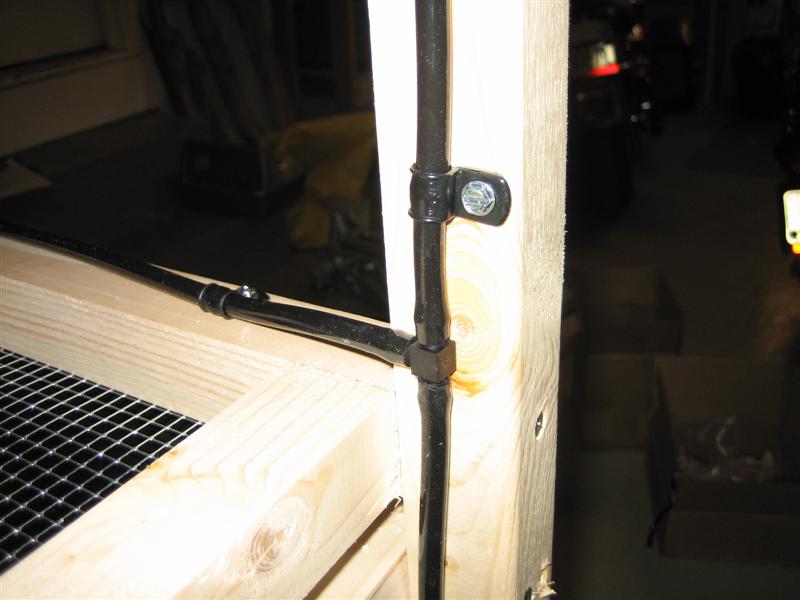
I used a minimum of Tee fittings and no elbow fittings to keep the cost of the system down. I also elected not to use any drain valves. I have found from experience that they are really an unnecessary expense. You can hold the drinking valve on each level open with your finger to purge the air from the system.
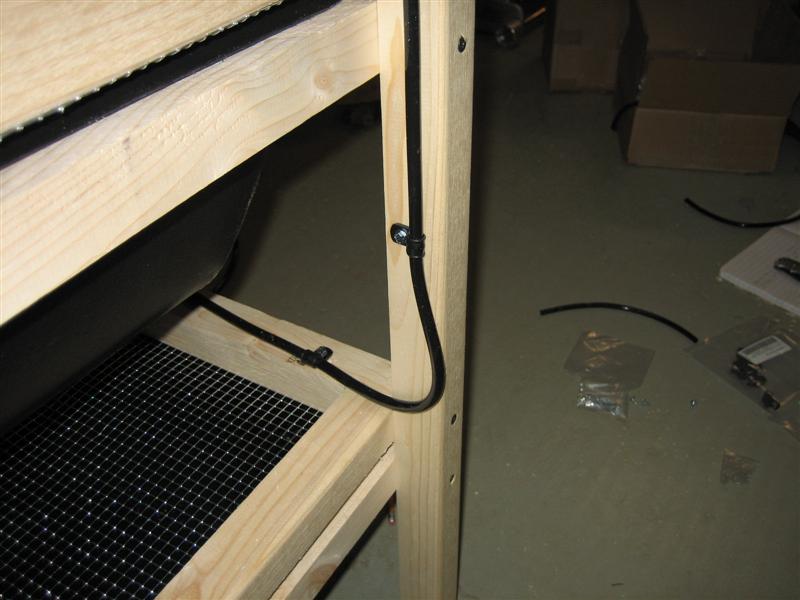
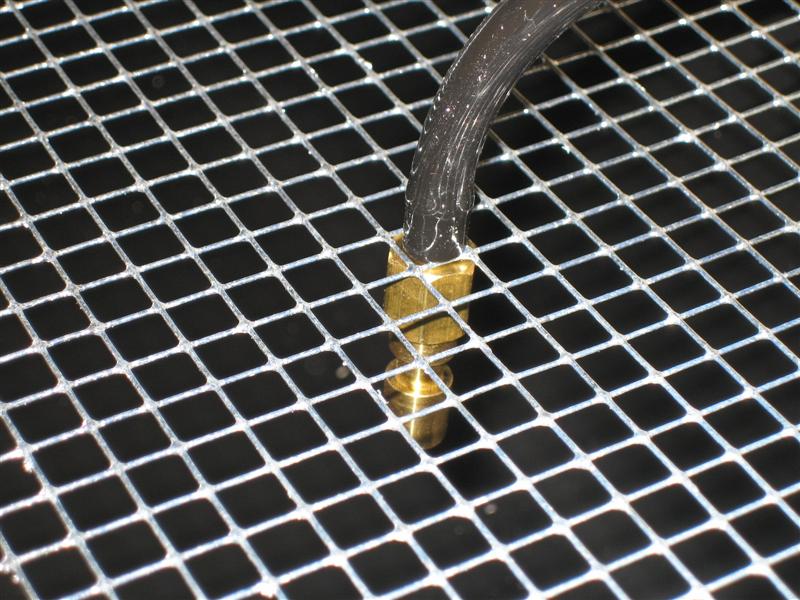
Below is a picture of how the valve is set in the tub. You'll noting that I have not used the valve brackets. That's because they do not fit right with the 1/3" hardware cloth. My solution was to install the valve through the screen. I put the valve stem through the screen then attached the tubing to it. Neither the tubing nor the valve body will pass through the screen, so it's a good fit.
This does create one small issue. When removing the tubs for cleaning they catch on the valve and can't be slid all the way out. This is a minor problem however since all you need to do is slide the tub all the way to one side and compress it just slightly and it will slip from the runners and drop out.
Otherwise the system works perfectly, and the minor problem with removing the tubs is not a large drawback. If you are innovative, you can easily figure how to build the rack to avoid this issue, but it does complicate the design and I didn't want to do that here.
All you lack now for the watering system is the supply resevoir. You will need an 11/16" drill bit to install the supply valve. Drill the hole in the side of the bucket as close to the bottom as you can while still being able to attach the nut on the inside of the bucket. Once it is installed, run another length of tubing from the valve to the first tee in the water system. Allow enough tubing here to let you suspend the bucket above the rack a few inches so the water will gravity feed to the tubs.
This type of water system does not have to be fed from a bucket you fill manually. It can be hard piped to a constant water source, or a supply resevoir with a float valve for automatic filling can be used.
I use a bucket for one reason - floods. Whether you use a homemade rack or a Freedom Breeder, sooner or later a drinking valve will stick and you'll have a flood. The only question is how bad a flood will you have. With a bucket like I use there is a limited amount of water available to the system. A flood will result in the emptying of the bucket and that is all. With a constant source system, the flood will continue until you catch it. The difference is losing one tub of rodents versus the potential to lose that tub and several below it as well as flooding the room or building the rack is in and doing further damage.
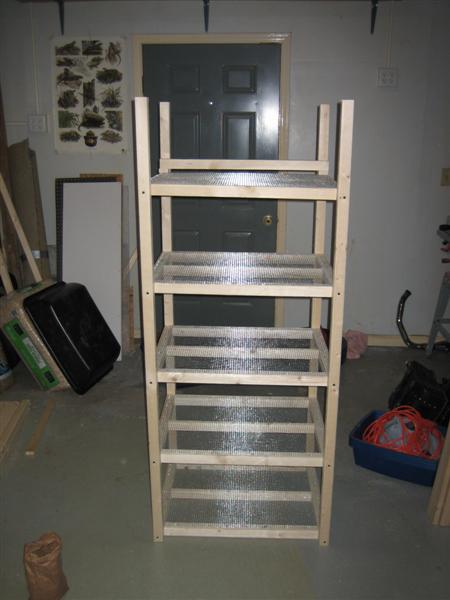
The rack is now finished. Add some bedding and fill the bucket and food hoppers and you're ready to start producing rats.
The total cost for the entire rack, including water system was around $100, and around 4 hours total time.
Additional Notes on Materials and Construction
- The concrete mixing tubs I used I purchased at Lowes, $4.95 each I believe. They are manufactured by MacCourt Products (www.maccourt.com), model number AT2606. They measure 26" x 20" x 6".
- I chose to rip my 2x2s from 2x4s because the resulting pieces are far better. In my area the 2x2s I can get are of pathetic quality. They're not straight, they're rough, and difficult to build anything with. If you select a good 2x4, you can rip it into very usable 2x2s. If you don't have access to a table saw though, you can always go to Lowe's and dig through the 2x2s there and pick out the best ones you can find.
- You've probably wondered from the start why I used 1/3" inch hardware cloth. The short answer is because it's bigger than 1/4 and smaller than 1/2. I use 1/4" on my mouse racks, but the rats I think, with their larger mouths, have a little difficulty eating through the 1/4" screen. The problem is I, like most others, prefer to use a higher protein dogfood to feed my rodents. The dogfood will fall through 1/2 screen or worse get caught half way through it. This results in wasted food, and the tubs catching on the pieces that don't fall all the way through.
As a result, if you use 1/2" screen, you have to use a lab grade diet which comes in larger pellets. I do feed my breeders Purina Rat Diet to maximize production, but it's an added expense to feed them to the young to be used as feeders. The solution is to use 1/3" screen for the rats.
Now I could be evil and not tell you where to get it. I looked for a supplier of this stuff for 4 years or so before finding one. I finally found it at http://www.klubertanz.com/. The only thing is you have to buy at least 42 feet of it. However they also carry the watering system supplies so you might be able to get everything from the one place.
*** NOTE: I have recently been informed by a visitor to the site that Kluberantz no longer carries the 1/3" hardware cloth and doesn't expect to in the future. At this time I do not know where or if it can be found in the U.S. I decided to leave the link up though so that if you want to contact them and ask if they have it you can. Perhaps if enough people call requesting it they will put more effort into stocking it again. - If you choose not to use wheels on your rack then I would recommend cutting the legs 68" rather than 66". Without the wheels, the bottom tub will actually sit on the floor. This is fine until you need to remove the tub and you cant drop it to clear the water valve.
- Remember, a 2x2 is not 2" x 2". In wood measurements, a 2x2 is actually 1.5" x 1.5", just as a 2x4 is actually 1.5" x 3.5". To rip the 2x4s use the board as a guide to set the saw. Place the board on edge against the blade and move the ripping fence up to it. This will give you the proper width for the 2x2s. You'll also have a very thin strip of scrap left over from each 2x4.