
The basic assembly of these cages is very similar to the 3 x 2 cage I have posted. There are some changes though. In particular the door on this cage is of a new design as far as my cages go. The ventilation is different as well and will be much easier for those with fewer tools or skills to make. For reference, I used Minwax Red Oak stain and a semi-gloss polyurethane topcoat. I've used Colonial Maple stain for years, but I did a fireplace for the house in Red Oak, and decided I liked that darker shade, and am now using it for my cages.
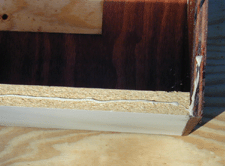
One other thing to note, when I originally built this cage, I used melamine for the cage bottom, as is shown here on this page. In later years I stopped using melamine for this and instead switched to regular plywood with linoleum glued to it. This has proven to be a superior floor for a cage. Melamine I found usually began to show signs of wear and deterioration after 5 years or so, less if the snake is a chronic water bowl tipper. The linoleum lasts far longer and the added effort to use it is negligible.
- Material List
- Bottom - (1) 48"x 24" piece of melamine or 3/4" plywood
- Ends - (2) 24.5" x 18" - 1/2" Plywood
- Back - (1) 48" x 18" - 1/2" Plywood
- Top - (1) 49" x 24.5" - 1/2" plywood
- Door frame top - (1) 49" 1x2
- Door frame sides - (2) 14 3/8" 1x2
- Substrate dam - (1) 49" 1x3
- (1) 1/4" plexiglass cut to fit the door opening.
- (4) 1.5" hinges
All of the above pieces of plywood can be cut from a single 4'x 8' sheet. I would suggest double checking the measurements for the door frame after you have the box cut. Variances in board width may cause the side pieces of the frame to be a slightly different length.
The side pieces will overlap the back piece with these measurements. If you prefer to have the back overlap the sides the back piece will be 49" and the sides will be 24" instead of 24.5".
I suggest you use at least an AC grade plywood. Better grades are available but will increase the cost. What you use will be determined on how good you want the finished cage to look.
I used AC plywood and the approximate cost of materials for this cage was $75, including the light and heater.
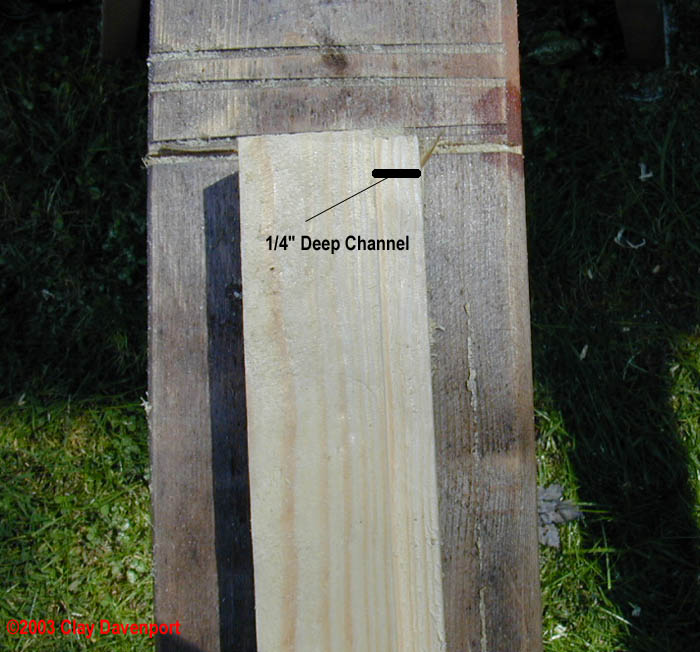
I won't go into the basic assembly on the cage itself, since that part is identical to the 3 x 2 cage. We'll start this series with the box assembled, and we'll go straight to the making of the door. Below is a picture of the router bit I used to make the channel in the door frame that will accept the 1/4" acrylic door.
-
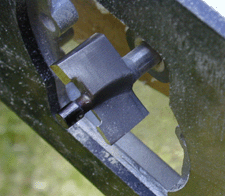

1/4" Rabbit bit
This is a rabbit bit, and has a guide to control the depth of the cut. Set the router to a 1/4" depth and you'll get a nice straight channel for the acrylic.

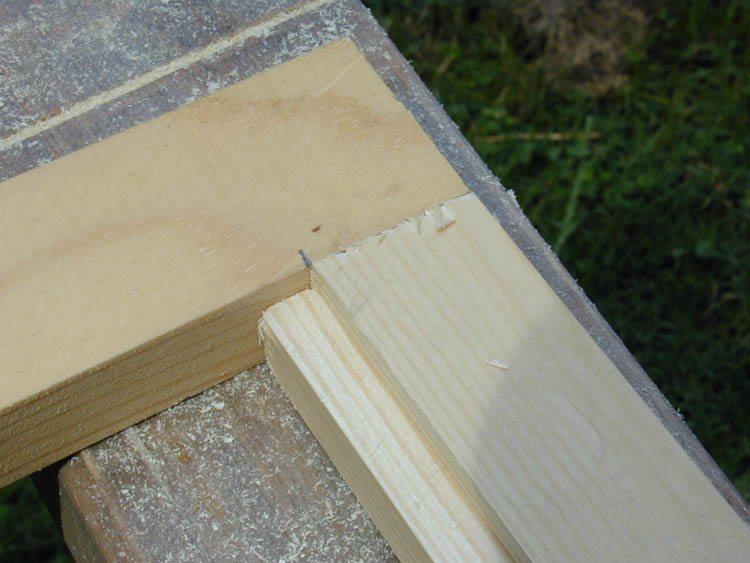

After applying the bead of Liquid Nails, the pieces are set into place then nailed with 3d finishing nails. Pre-drill the holes for the nails to make sire they don't split the door frame.
Later you can use a nail set and putty to cover the nail heads for a nice look.
Begin assembling the door frame with the substrate dam. Once it is secure, continue with the three remaining pieces. Further pictures of the frame itself will be further down in the section dealing with installing the door.
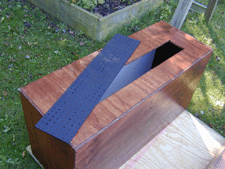
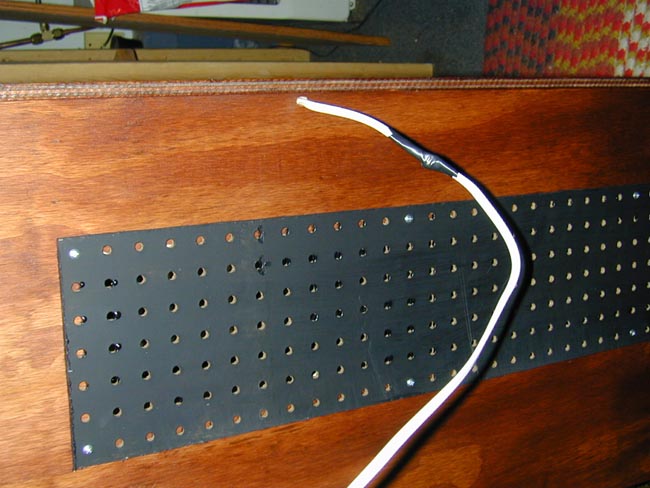
Rear Vent
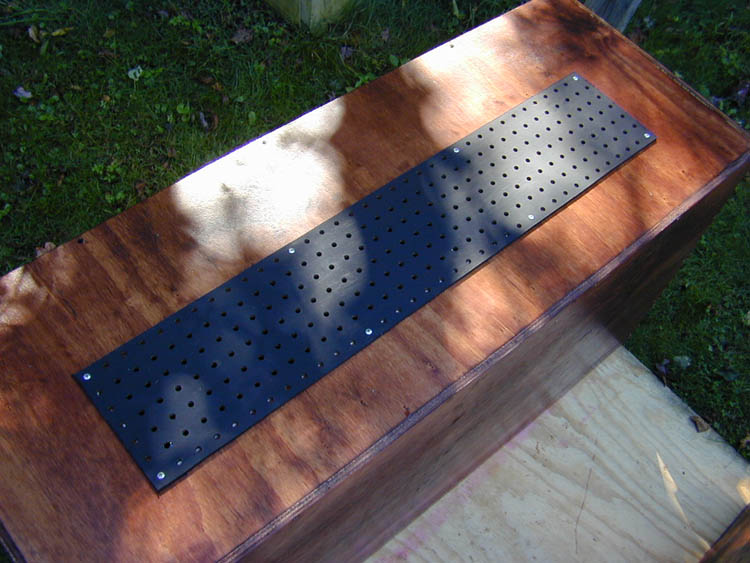
For these cages I decided to utilize 1/4" pegboard. These vents are easier to install than the framed aluminum mesh vents in some of my other cages. The only tool required is a jigsaw to cut the hole.
I didn't like the normal brown color of the pegboard, so I painted the vents flat black for a better finished look.
You can make the vents whatever size suits you. For this cage I used a 5" wide x 34" long single vent. The vent is set 5" from the top edge of the back piece, and centered from side to side.

Here is the painted vent with the hole in the back of the cage. Cut the vent 2" longer and wider than the hole to allow a row of holes to extend past the vent opening. These will be where you screw the vent in place.
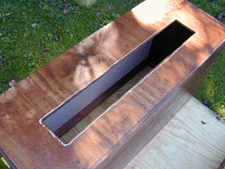

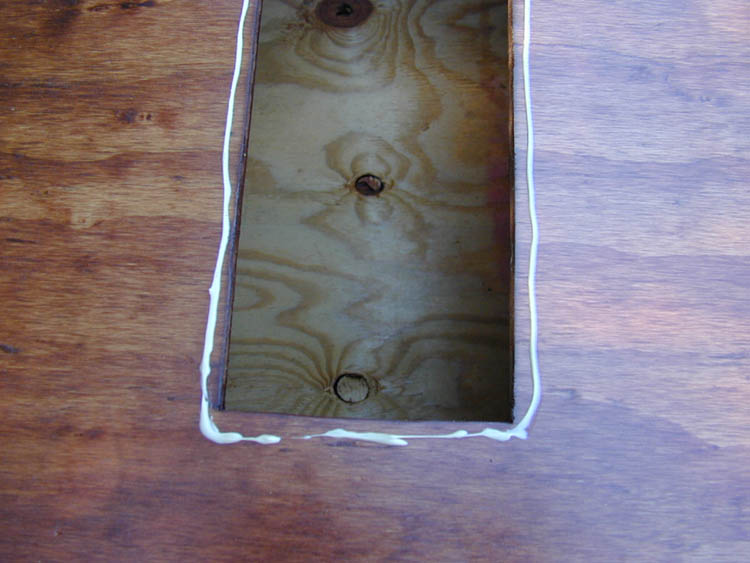
Again liquid nails was used to glue the vent in place. Use a small bead around the edge of the opening. Screws will be used to tighten the vent down until the liquid nails can dry.


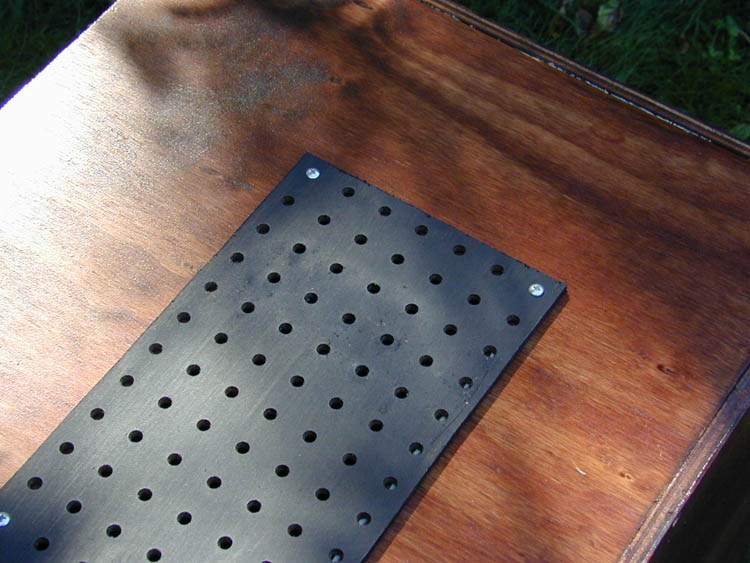
Center the vent over the opening and using a few screws tighten it down. I used 8 screws per vent.
Heater
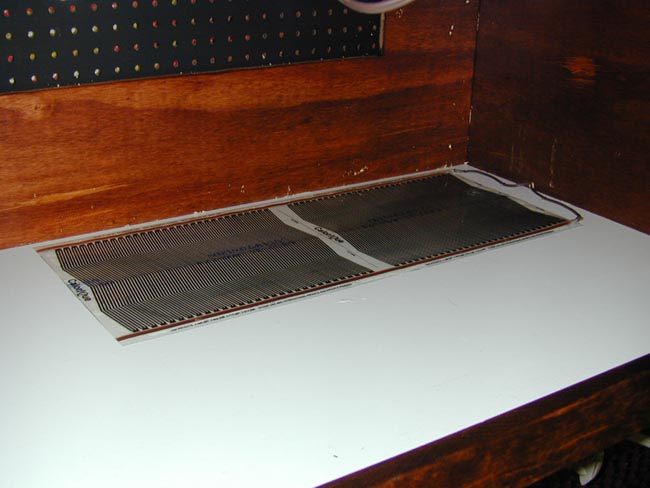
To heat these cages I used a 2 foot piece of 11" wide flexwatt per cage.
After several years of service, I removed the flexwatt heaters and converted all of these cages to use the radiant heat panels from Reptile Basics.
To install the heater first drill the hole in the end of the cage where the wire will pass through. Thread the wire through the hole and attach it to the flexwatt. Directions for this can be found on my page How to Wire Flexwatt.
Once the wires are attached, seal the connections with silicone to make them water proof and allow them to dry. I also tape the heater to the bottom of the cage to prevent the snake from getting under it and using it for a hiding place. For this I use aluminum tape and completely cover the entire heater. This will also provide protection to the surface of the heater.
The tape is not pictured here because I initially used silicone to attach the heater to the floor. This worked for about a year, and it turned loose.
Do not use duct tape for this though. It will turn loose within a few months and will get stuck to the snake's skin.
In addition you may want to staple the wires to the floor of the cage to keep the snake from crawling under them as well, which they will most certainly do.
Lighting
I decided to use lights in these cages, which is something I normally do not do. The dark color of the stain made it darker than normal inside the cage, and I will be housing adult boas in these units and wanted to hve the ability to create an artificial photoperiod.

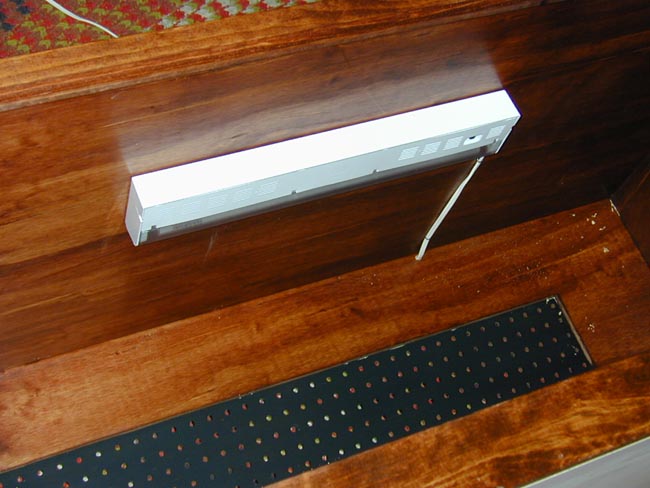


I used 18" flourescent fixtures purchased at Wal Mart for $7.00 each. These lights come with a plug attached and the cord must be cut and put back together to install them.
First mount the light to the cage, then pull the cord straight to the back wall. Cut the cord about 4" past where it touches the back of the cage.
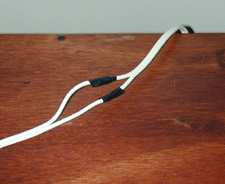
Drill a hole in the back big enough for the wire and pull it through. I suggest you staple the wire to the ceiling of the cage to prevent a snake from getting behind it, I assure you they will eventually.
Once the wire is secure inside the cage splice it back together at the point it was cut. Be sure to insulate each wire individually with electrical tape then tape them together. You don't want the bare wires coming in contact with each other when it's plugged in.
Be sure to test the fixture before you install it. If you discover it is defective after you have cut the wire, then you can't take it back.
Door
For the doors of these cages I decided to use a new design. I went with unframed 1/4" acrylic to take a further step in reducing the weight of the cages. The doors close into a 1/4" deep channel cut with a router and detailed above.
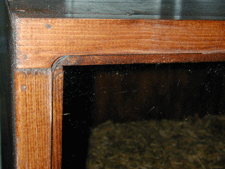
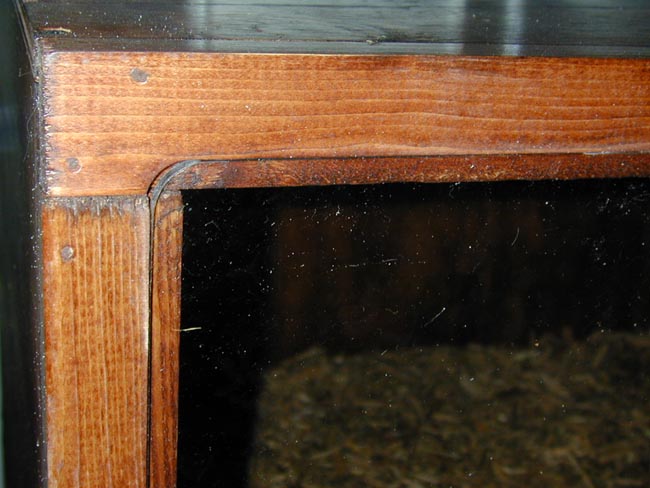
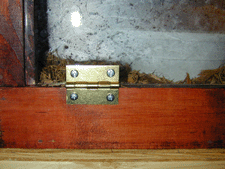
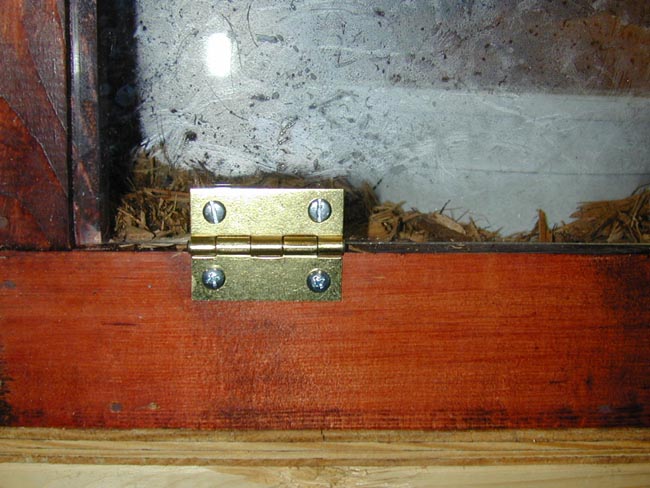
The doors are hinged using four 1 1/2" brass plated hinges. The hinges are secured to the substrate dam with machine screws. The corners of the door need to be rounded to fit the opening correctly. This can be done with an electric sander, or a Dremel tool.
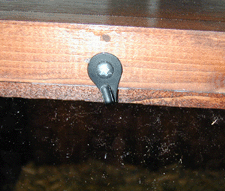
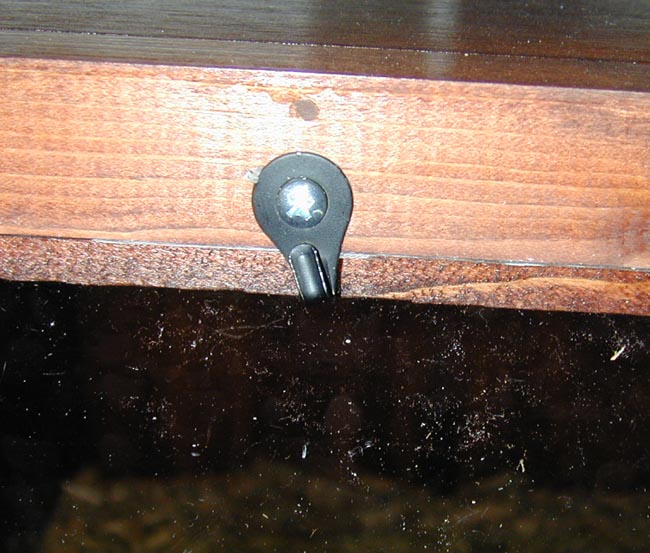
For latches I used metal mirror hangers painted black. I used a hammer to close the hooks on the hangers. Many things can be used for a latch, a small piece of wood that pivots on a nail, barrel bolts, or a latch of your own design. The main thing is that it is secure.
In hindsight, these latches are pretty sad, but I had the pieces laying in a junk drawer and they have served their purpose without a single escape for more than a dozen years now.
In the top center of the door, you'll want a pull of some sort. I used a wooden knob stained to match the cage and siliconed to the acrylic.

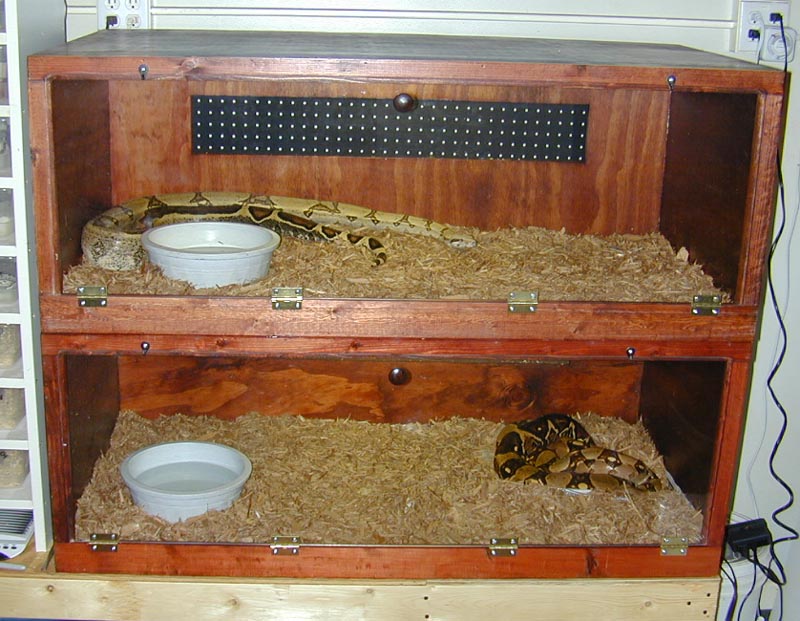
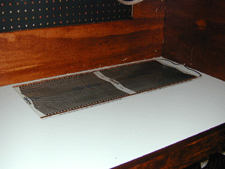
Here is a picture of two of the finished cages, complete with the resident boa constrictors. The third now sits atop these two, but the door was not yet installed when this picture was taken.