
Many people who raise their own rodents, myself included, use a system similar to what Ralph Davis has detailed on his website. This method involves roatating females through the system and pulling pregnant females from the breeding colony to give birth alone in a birthing tub.
This is by far the most effecient and consistently productive means of raising large numbers of rats that I have found.
The rack described on this page is a birthing rack. It can also easily be used to raise mice in as well, just don't use 1/2" screen.
This rack shouldn't be used as a sole rack to raise rats however, it should be used in conjunction with one or more of the breeding racks which use the larger tubs, such as the rack shown here
You'll see I chose not to use the traditional suspended tub design normally used for these racks and instead elected to support the pans from underneath. For a rodent rack that is multiple tubs wide, getting the support runners spaced properly is aggravating. Also, with the bowed sides of the cat litter pans, the tubs tend to be more prone to slip from the runners at times and fall if they are not spaced exactly right. Over time bedding will accumulate in the runners further increasing the potential to slip out.
Supporting the tubs from underneath solves all these problems. It makes the rack much quicker to build, and much more user friendly in the end.
Disclaimer: This is the first rack of this design I have built. During the building process I realized I had made a couple of minor mistakes in my rough drawing involving certain measurements and material requirements. These mistakes were corrected during the assembly process, and I am pretty sure I got the final materials list correct. Just keep in mind you may have to have an extra board or something before you get it finished. I will be building another of these soon and will knowfor sure that the list is correct.
If there is a mistake, I'm sure someone will let me know, and if there isn't one someone will think there is and try to point that out as well haha.
Be sure to read the notes at the end of the page before beginning construction.
- Tools Used
- Table saw
- 10" Power miter saw
- (4) 90 degree corner clamps
- (4) large spring clamps
- cordless drill with bit for pilot holes and phillips screwdriver bit
- Pneumatic finish nailer (optional)
- Staple gun
- tin snips
- tape measure
- Materials List
- (14) 2x4 studs or (4) 2x4 studs and (20) good straight 2x2
- 2 1/2" wood screws
- Hardware cloth of your choosing
- (4) 1 1/4" Swivel Bearing Casters (light duty)
- (2) 4x8 sheets of 3/4" OSB
- 24 Large Van Ness cat litter pans (CP2)
- Cut List
- On a table saw, rip 10 of the 2x4s into 20 2x2. (Be extremely careful, don't want to lose a finger.) Save the thin scrap pieces left over. Remember, the 2x2s will actually measure 1.5 x 1.5, use the edge of the 2x4 to set the table saw.
- Cut the 2x2 pieces into the following lengths:
- (12) 62"
- (12) 16 1/2"
- (6) 59"
- (12) 19 1/2"
- Cut the 4 remaining studs to 67"
- Cut the OSB sheets into six strips 11" wide and 62" long
From some of the scrap pieces of 2x2, cut the following to be used as spacers:
(4)10"
(2) 5 5/8"
I initially used 5 1/2" spacers instead of 5 5/8", but after the rack was finished I found that the added space taken up by the wire caused me to have to adjust the levels slightly farther apart, so I decided 5 5/8" would work better.
Assembling the Rack
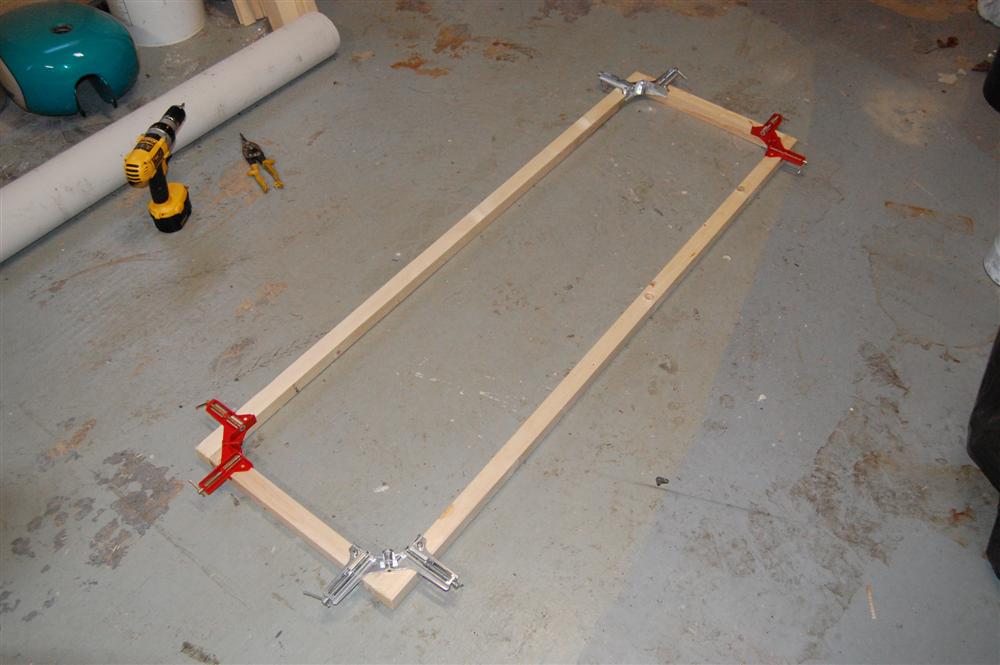
First we'll make the 6 frames. Take (2) 62" and (2) 16 1/2" pieces of 2x2. The 62" pieces will be the front and back and the 16 1/2" pieces will be the ends of each frame. Screwed together the frames will measure 62" x 19 1/2".You'll notice in the pictures I used four 90 degree clamps to hold the frames square while I screwed them together. This is not absolutely necessary if you do not have the clamps, but it does make this step easier.
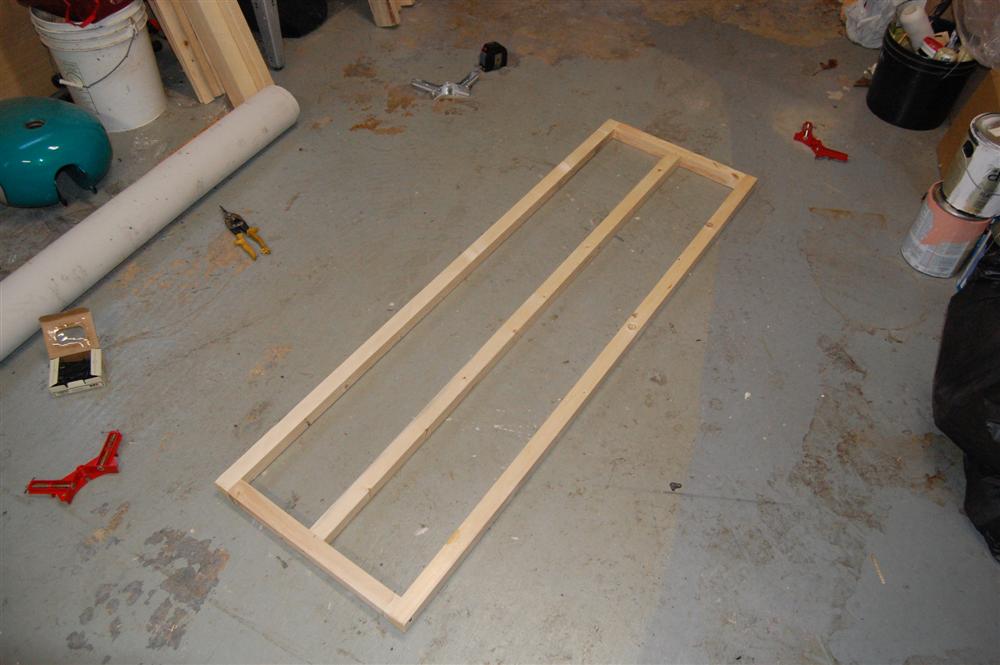
Once you have the four pieces screwed together, take one 59" 2x2 and put it in lengthwise in the middle of the frame. This piece adds support to the wire and creates a divider for the food bins.
Repeat this step to make the other five frames.
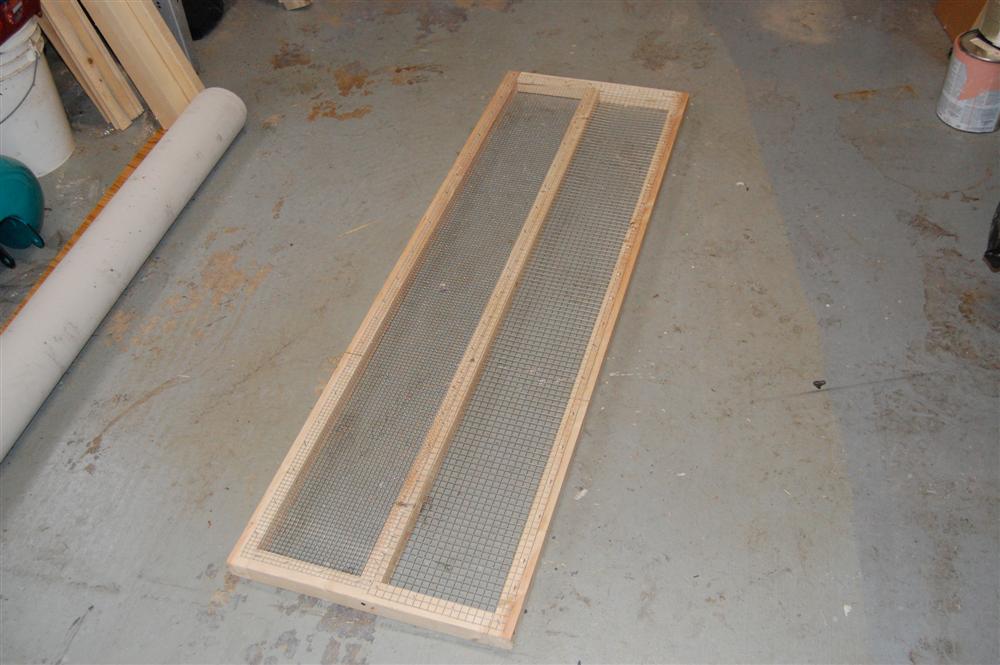
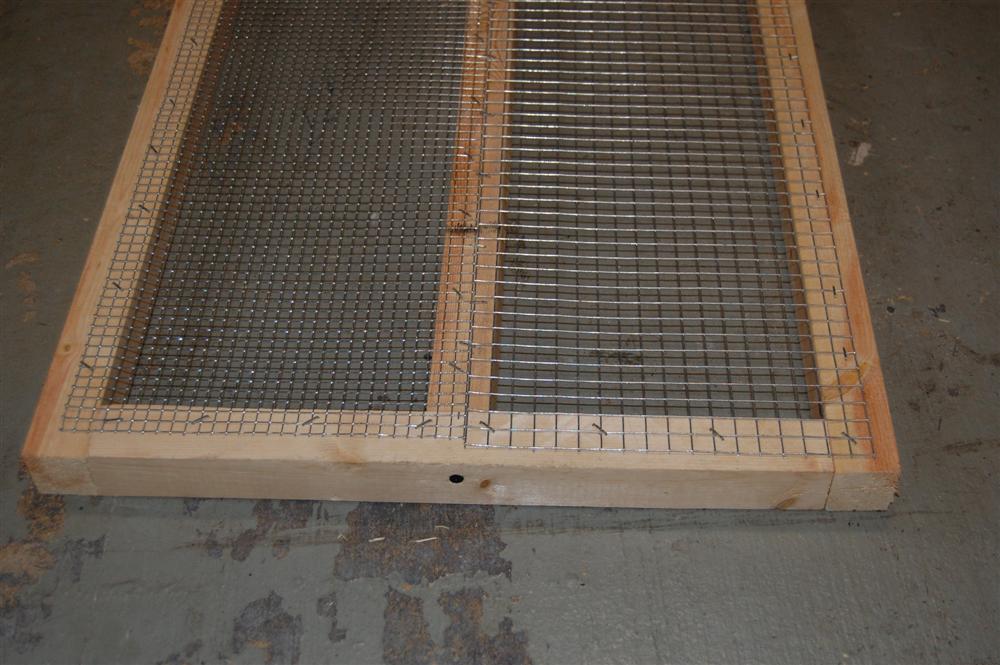
Next you'll attach the wire to the frames. Cut the hardware cloth just a little smaller than the overall dimensions of the frames.
You'll see here that I actually used two different sizes of wire 1/3" and 1/2". My reason was the foods I use to feed the rats. I like to use rodent block, but it is not always available to me and when I don't have it I have to fall back on a high protein dog food. I also supplement with a small percentage of non medicated cattle feed at times.
The block feed is too large to be easily eaten through the 1/3" wire and the dog food tends to fall through the 1/2" and creates waste. I decided to split the screen so I can place either food in the appropriate area of the rack and use it effeciently.
You'll staple the wire to what will be the underside of the frames. When attaching the wire, begin by putting a staple in the center of one end. Then position the screen so that it is centered on the frame and put another staple out from the first. Continue until that end is secure and then start working your way toward the other end. Put a staple a little way up one side, then one in the middle, and one in the other side in a line. Keep doing this until you get to the other end then put one in the center and work your way out to the corners. This method of attaching the screen will ensure it lays flat with no puckers to worry about. If you start by securing all four corners then you'll end up with a high place in the screen somewhere.
Install the screen on the remaining five frames.
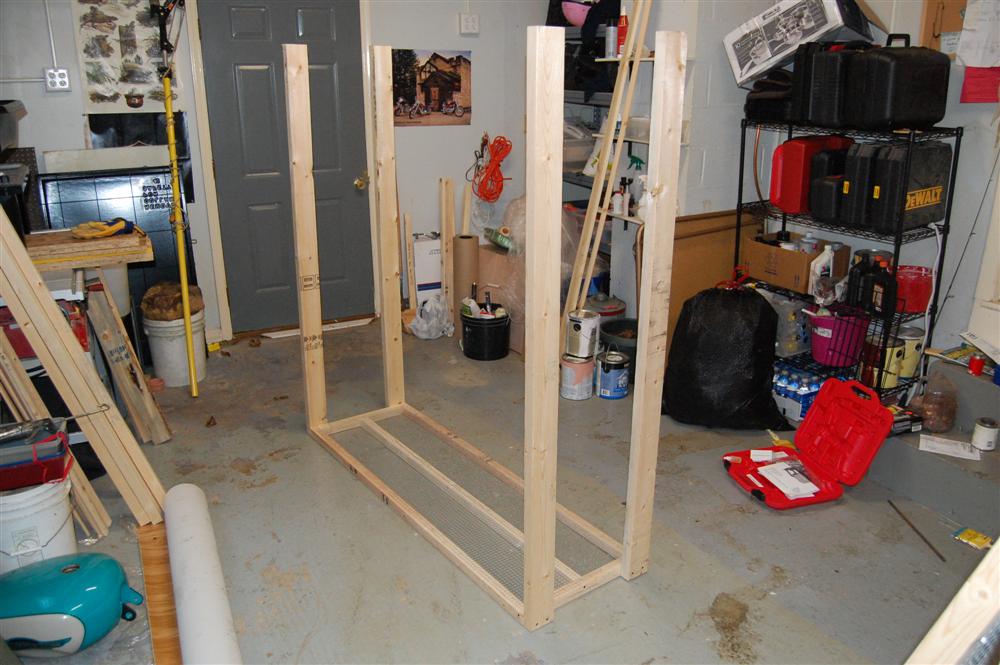
Next we will be attaching the legs of the rack. I managed the complete assembly by myself, but you'll find it much easier if you can enlist an extra pair of hands from this point.
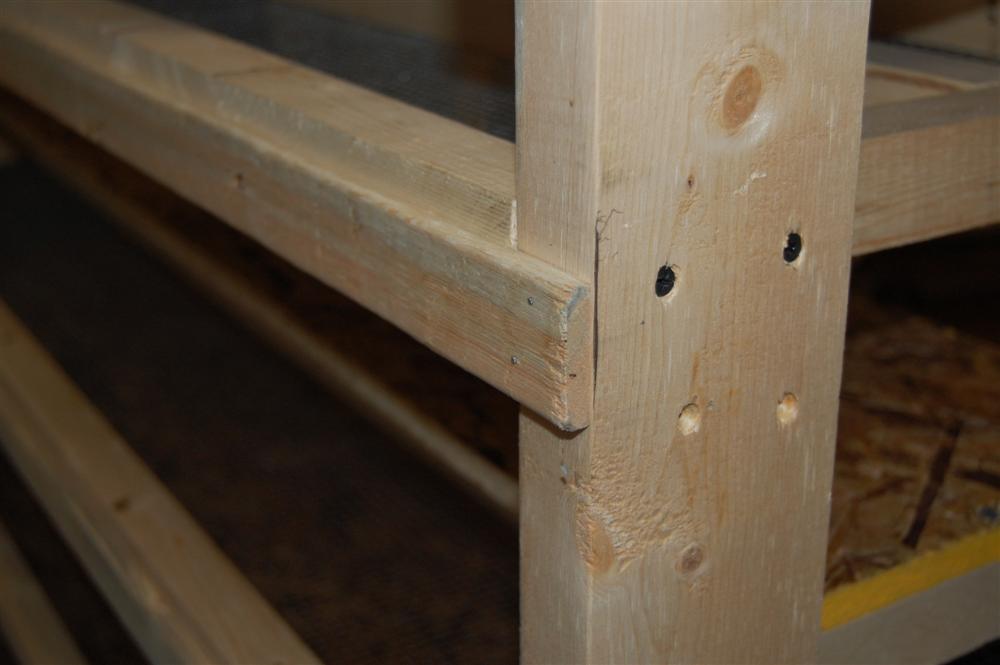
Take one of the frames and the 67" legs. Set the frame face down (screen up) on the floor, and attach the legs to the corners of the frame on the ends with two screws per leg.
The legs should be flush with the front and back of the frame. You may also find it easier to attach the legs to the first frame using the same method as I did with the breeding rack here. I could not manage flipping the rack by myself to attach the second set of legs so I had to begin the assemble in the upside down position.
Now take your four 10" spacers and place them on the corners of the frame you just installed. Place the next frame on the spacers, again being sure to have the wire oriented properly.
Screw the legs to the second frame, keeping them flush with the front and back edges. Repeat this process until all six frames are attached
Next we'll install the 2x2 supports that the OSB board will attach to With the rack still inverted, take your two 5 5/8" spacers and place them on each corner of one end of a frame. Take a 19 1/2" 2x2 and lay it on the spacers, then put two screws through each leg to secure it.
Repeat this process until all 12 of these pieces are in place.
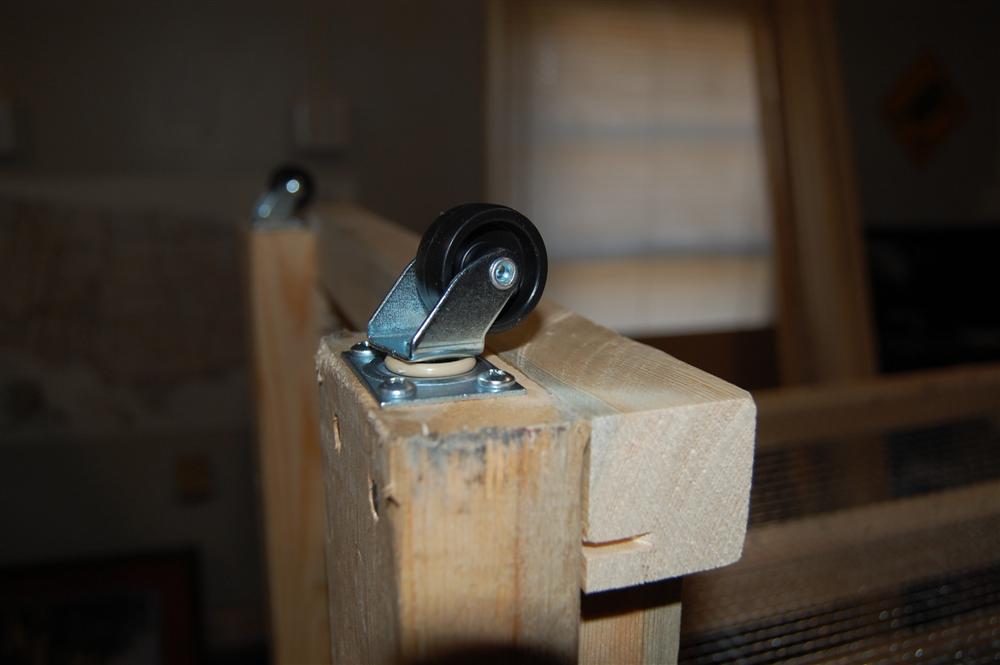
While the rack is still upside down, go ahead and attach the wheels to the ends of the legs.
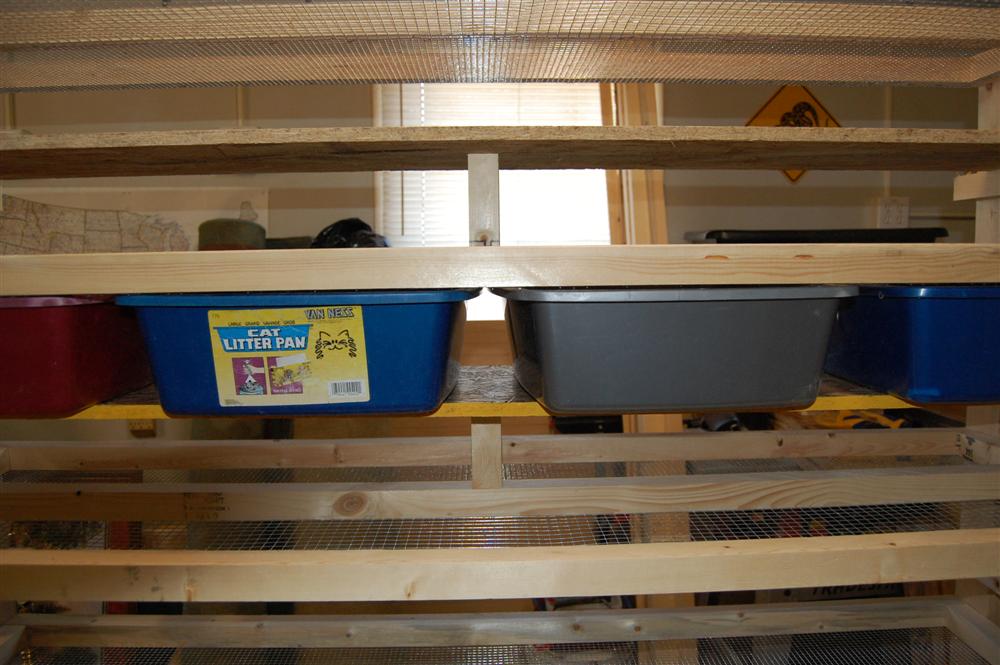
Now flip the rack upright. We'll install the long pieces of OSB board onto the supports we just installed. The tubs will sit on the OSB when the rack is finished.
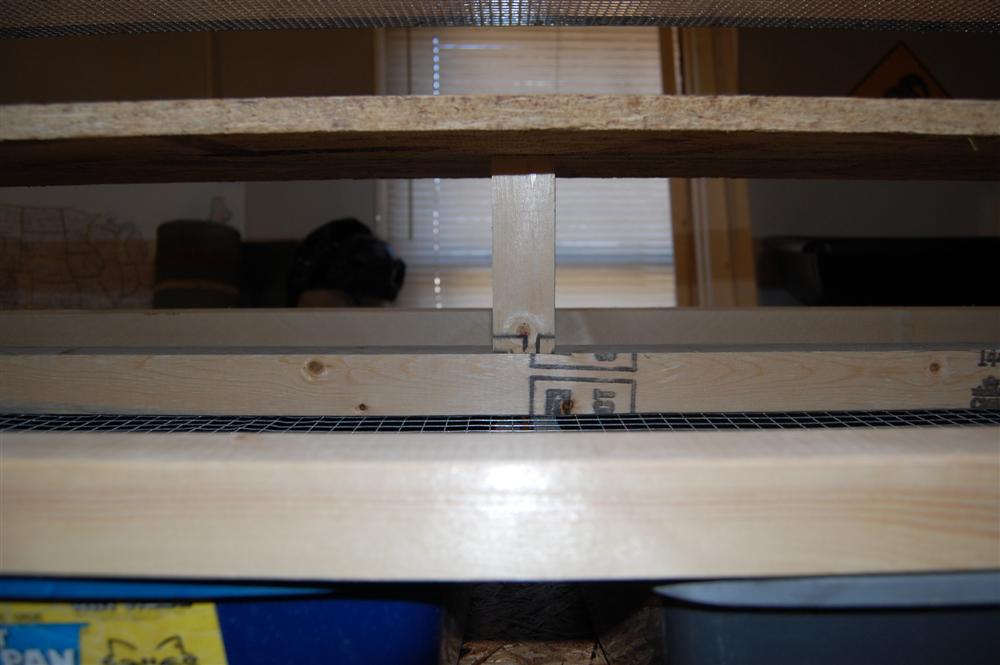
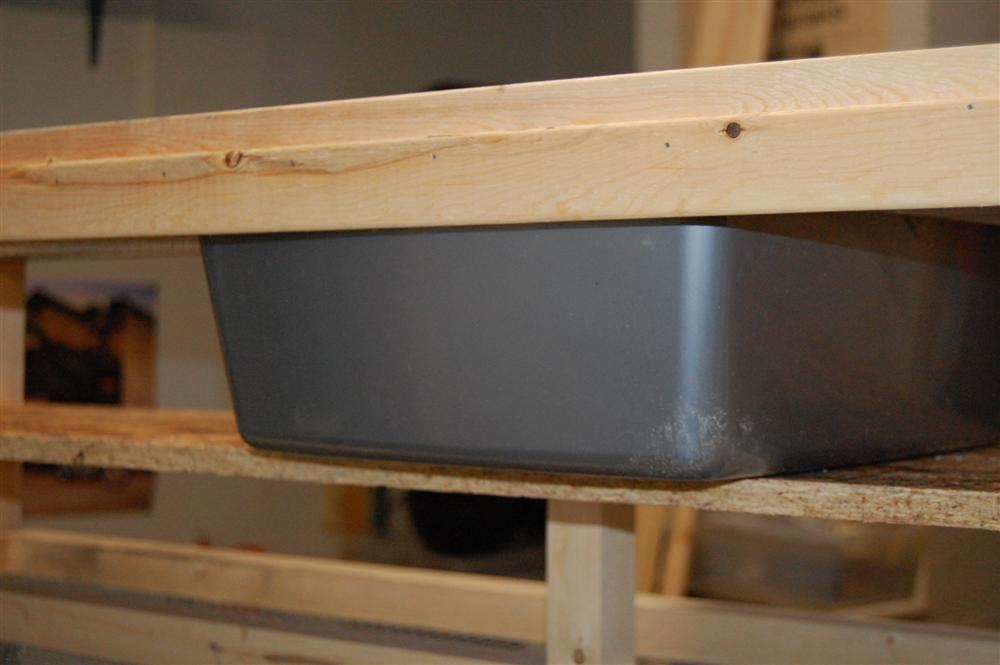
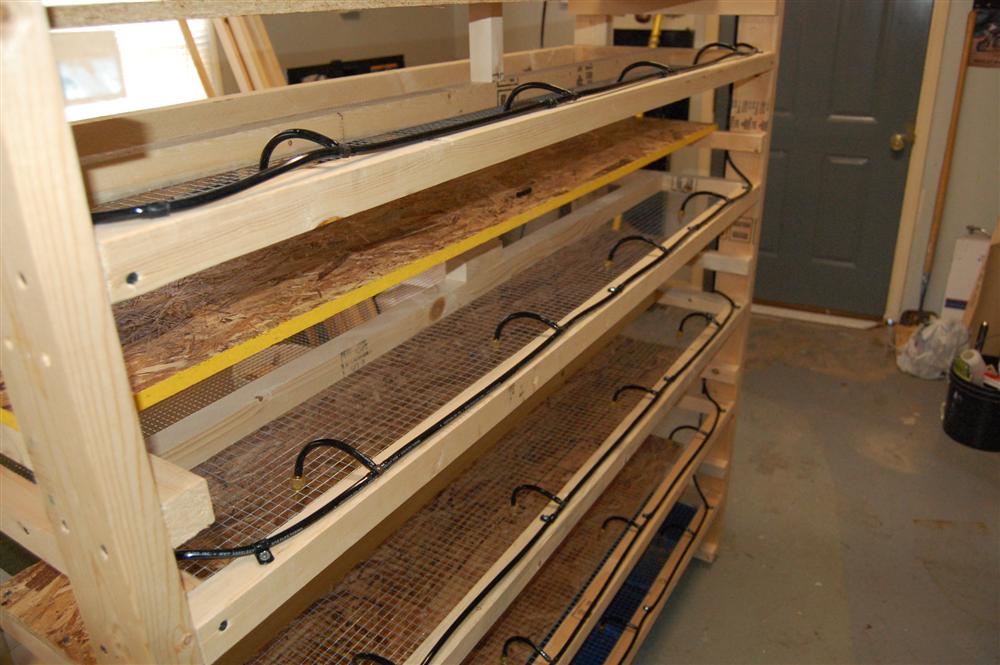
The positioning of the OSB strips is important. You may have noticed by now that the OSB pieces are not as wide as the pans are long. The reason is if the pans were completely supported by the OSB, you wouldn't be able to put them in the rack because they wouldn't clear the water valves. The OSB shelf has to be narrow enough so that the pan will drop out before it catches on the valve. The shelf is still plenty wide to support the pans though.
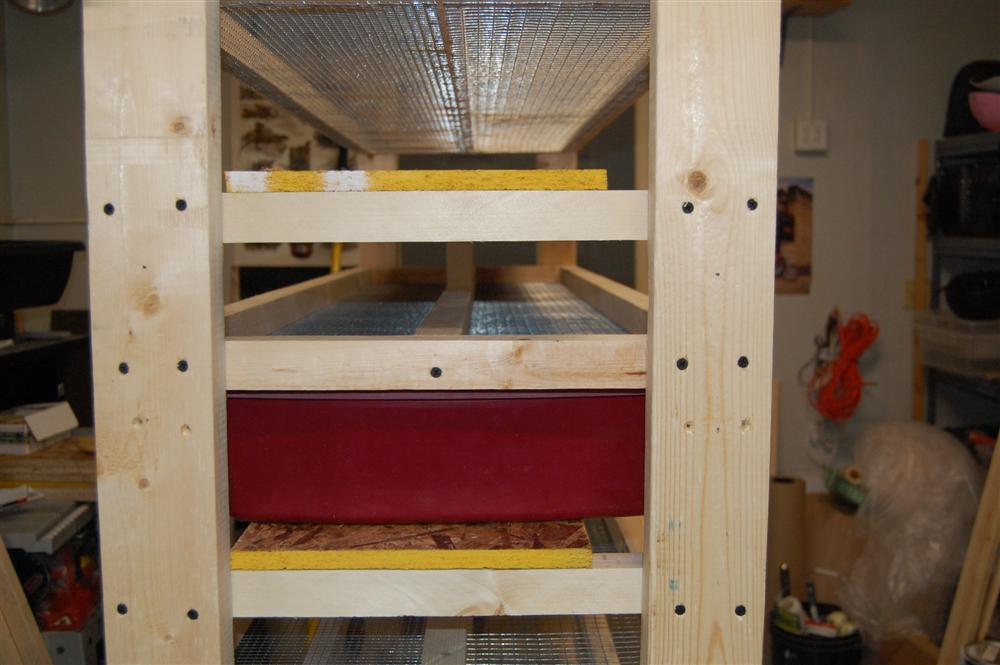

In the first picture, the front of the rack is on the right. The second picture is taken from the front of the rack. You can see in the first picture that the OSB shelf is positioned at the front edge of the rear leg of the rack.
Screw the shelves to the 2x2 supports on either end. Repeat until all 6 shelves are installed.
I also cut some support pieces shown in the pictures below, meant to sit under the center of the OSB shelves. I had expected some minor sagging of the shelves due to the length. Once the rack was built though, the sag was so slight the supports weren't needed.
Over time though, with the weight of the rats and bedding, the shelves might start to sag further, I don't know. Just in case, I wanted to mention these braces. They measure 4 1/2" long and you should have adequate scrap 2x2s to cut them. While you have the scrap handy, I'd recommend cutting them in case they prove to be needed after the rack has been in use for a while.
Now we'll install the back stops for the pans. This will prevent you from accidentally sliding the pans in too far and leaving a gap in the back the rats might escape through.
For the backstop we will use the thin scrap pieces you had left over from ripping the 2x2s. If you chose to use factory 2x2s, then you can purchase something called lattice strips, which are very inexpensive, or you can simply skip this step entirely and just be careful not to slide the pans in too far.
Really all you'll do is cut the scrap strips or the lattice strips to the width if the rack and attach them to the back so that the pans hit them when fully inserted. I attached them with finishing nails using a nail gun.
Installing the Watering System
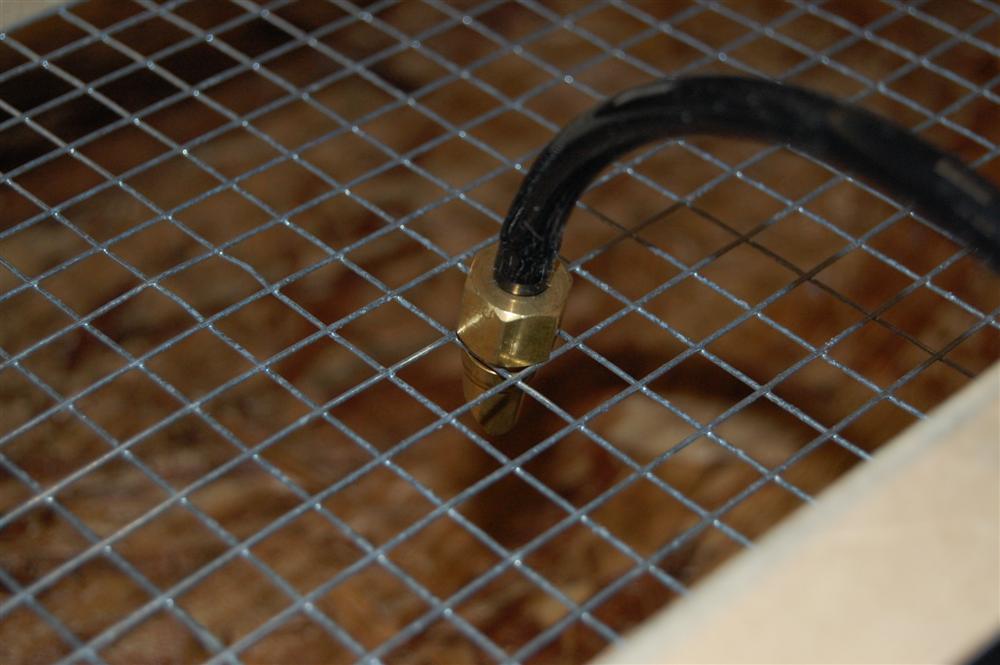
As always, I used an auto watering system on this rack. I plumbed it differently that I normally do however. I was browsing the Edstom site once and came across the method of plumbing they suggested and decided to do it that way this time.I routed the tubing in a reverse S fashion. The tubing leaves the supply bucket and goes first to the bottom level. Then is zig zags back and forth to the top level. It occurred to me that routing the tubing this way should increase the water pressure to the top level, which is usually low due to the limited distance I can place the bucket above the rack. Perhaps it won't make any difference, but all it took was a few extra feet of tubing. Parts List You'll need the following components for the watering system. I used the Edstrom valves on my racks because that was what was common at the time. You can still get those from Klubertanz. That link goes directly to that page of their PDF catalog.
Reptile Basics is also now carrying a full line of watering system supplies. Their valves are slightly different than Edstrom, but quite a bit cheaper and look to be of fine quality.
Click Here to go to their watering system page.
- 45 feet of 3/16" tubing
- 24 Edstrom Standard valves with 3/16" barb fittings
- (23) 3/16" barb Tee fittings
- (1) 3/16" barbed Elbow
- 1 supply valve with 3/16" barb outlet
- 35 3/16" tubing clamps (loop clamps) with screws
- 1 bucket (purchased at Lowe's, about 3 bucks)
All you lack now for the watering system is the supply resevoir. You will need a drill bit to install the supply valve. Drill the hole in the side of the bucket as close to the bottom as you can while still being able to attach the nut on the inside of the bucket. Once it is installed, run another length of tubing from the valve to the first tee in the water system. Allow enough tubing here to let you suspend the bucket above the rack a few inches so the water will gravity feed to the tubs.
The photo below shows the routing I used for the water system denoted by the red line. The block above the rack is the bucket reservoir.

This type of water system does not have to be fed from a bucket you fill manually. It can be hard piped to a constant water source, or a supply resevoir with a float valve for automatic filling can be used.
I use a bucket for one reason - floods. Whether you use a homemade rack or a Freedom Breeder, sooner or later a drinking valve will stick and you'll have a flood. The only question is how bad a flood will you have. With a bucket like I use there is a limited amount of water available to the system. A flood will result in the emptying of the bucket and that is all. With a constant source system, the flood will continue until you catch it. The difference is losing one tub of rodents versus the potential to lose that tub and several below it as well as flooding the room or building the rack is in and doing further damage.
That's it, now you have a 24 slot birthing rack ready for preggo moms.
Additional Notes on Materials and Construction
- I chose to rip my 2x2s from 2x4s because the resulting pieces are far better. In my area the 2x2s I can get are of pathetic quality. They're not straight, they're rough, and difficult to build anything with. If you select a good 2x4, you can rip it into very usable 2x2s. If you don't have access to a table saw though, you can always go to Lowe's and dig through the 2x2s there and pick out the best ones you can find.
-
This rack is tight. I spaced the levels as close as I possibly could while still allowing me to fill the feed hoppers.
I did this in order to get 6 levels in the rack in the vertical space I have to work with in the rat barn. This is as tall as I can have a rack and still have room fo rthe water bucket on top.
If you have additional overhead space, then you might prefer to make the legs longer and increase the space between levels. You would do this by making the 10" spacers longer.
